Understanding blending modes
The way that layers interact with other layers in the stack is determined by the blending mode of the upper layer.
The way that layers interact with other layers in the stack is determined by the blending mode of the upper layer.
By default the layer’s mode is set to Normal, which causes the picture content on the upper layer to obscure the picture parts beneath, but Photoshop has many other ways to control how these pixels interact. Called blend modes, the different options provide a variety of ways to control the mixing, blending and general interaction of the layer content.
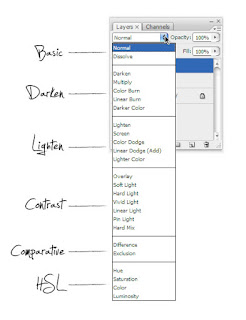
The layer blend modes are located in the drop-down menu at the top left of the Layers palette. Blend modes can also be applied to the painting and drawing tools via a drop-down menu in the tool’s options bar.
Blending modes are split into 6 different sections. The Basic ones replace the base pixels, the Darken ones darken the base pixels, the Lighten ones lighten them, the Contrast ones increase or decrease overall contrast, the Comparative ones invert the base colour and the HSL modes apply a specific colour component. Some blending modes need a bit of opacity tweaking in order to get the best effect. As with a lot of Photoshop’s options, experimentation is the only real way to get a thorough understanding.
No comments:
Post a Comment