
Tuesday, June 30, 2009

Creating Stereographic Planets


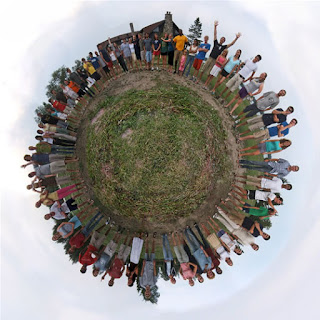
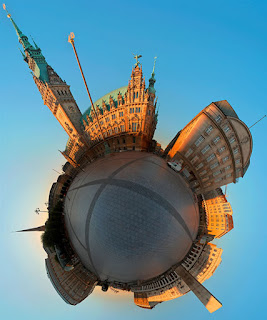
Well nearly, but who doesn’t want to be a God in their own right and create their own Little Planet? I do! Creating the Little Planet look is a fairly easy process, and not only that, they look really cool too. But before you get on your way to becoming a God, you might want to know a few things.


Inspiration. Lee has put together a post featuring some awesome planets for you to take inspiration from : 10 Examples of Stereographic Planets

CAP Field trip to Mohonk August 23rd

Field Trip to Mohonk Mountain House. Led by Lisa Cuchara. Join CAP on an exciting day-long field trip to Monhonk Mountain House near New Paltz, NY, on Sunday, August 23, 2009. You will enjoy a great Sunday Brunch Buffet and have the opportunity to photograph their extensive buildings, grounds, gardens, etc. Something for everyone! Click for all the details including a description of the location, directions, and photos.

Important Notes:

  1. You MUST be a CAP member to attend this (or any) field trip. Membership is only $8 per year. One of the main functions of CAP is field trips.
  2. You MUST make your own reservation. You will need to call Mohonk Dining Reservations at 845-256-2056 and provide them with your credit card number, asking to be added to the Cuchara party”. Please email me, Lisa Cuchara, photographer67@comcast.net after you have called in your reservation.

For the handout please view here: http://capinct.org/Events.aspx

The Mohonk Mountain House, a 2,200-acre resort, is a nineteenth-century, Victorian-style castle, towering over a sparkling “lake in the sky,” featuring 251 spacious rooms of varying styles set in the heart of a natural preserve in the Hudson Valley. The Mohonk Mountain House is a about 90miles from Hamden CT (Rt 84 to I-87, exit 18 to New Paltz, 2 miles thru town and then 4 miles up the mountain).

The entire Shawangunk region was awarded the distinction of being named "one of Earth's "Last Great Places" by the Nature Conservancy. The Shawangunk Ridge supports a multitude of forests, lakes, rivers, wetlands, and rare plant and animal species. Over one hundred small rustic gazebos are dotted along their trails. Sky Top Tower has panoramic views of the Rondout and Wallkill Valleys and the Catskill Mountains; and Mohonk's award-winning show gardens have inspired photographers for more than 100 years. http://www.mohonk.com/index.cfm

Gardening has been a cornerstone of Mohonk since the land was purchased in 1869. Since then, Mohonk has maintained and added to its award-winning gardens, which reflect French and Italian influences, but focus mainly on mid-19th century picturesque landscaping. Founder Albert K. Smiley's original design has been maintained as the gardens have matured and evolved. They offer glimpses of the past, allowing guests to enjoy large masses of flowering annuals, perennials, and tropical plants, set against magnificent vistas and views. The Mohonk Greenhouse is home to outstanding collections of orchids, begonias, and fuchsias. You will find beautiful gardens throughout the Mountain House grounds, including ornamental grasses, herb collections, peonies, rock gardens, container gardens, and a butterfly garden. We have coordinated our trip to a time when the Mohonk gardens are resplendent in peak bloom. Explore
rose and herb gardens, wildflower and fern trails, rare trees, heirloom plants, Victorian maze, and awardwinning formal gardens, the mountain house itself, and even a leisurely walk up to the Sky Top Tower.

The prepaid cost is $64 which includes your day pass, use of the grounds for the entire day, plus the SUNDAY BRUNCH BUFFET (Offering the best of breakfast and lunch buffet selections, including: Omeletes made to order, Soup and Salad Bar, Carving Stations, Shrimp, Assorted Bagels and Lox, along with a Bountiful Dessert Buffet featuring our Chocolate Fountain! http://www.mohonk.com/dining/new_sunday_brunch.cfm.

We will leave from the Derby Rt 34 (exit 57 Rt 15) commuter parking lot at 8:00am. It takes about two hours to get there. People that want to leave earlier to get there sooner (or later and meet us at 11:15) are free to do so, just let me know.

Self-parking is available on the grounds; valet parking is provided for an additional fee of $3.00 per car. We will all meet inside at the lobby 11:15 and eat at 11:30. You can arrive any time and you can photograph before and/or after we eat as your day pass is good for the entire day. You will need to call Mohonk Dining Reservations at 845-256-2056 and provide them with your credit card number, asking to be added to the Cuchara party”. Please email Lisa Cuchara, photographer67@comcast.net after you have called in your reservation.

To see some photos of Mohonk you can visit their website: http://www.mohonk.com/index.cfm. I have also put some in the event announcement: http://capinct.org/Events.aspx

Monday, June 29, 2009

Seven Super Summer Tips

Seven Super Summer Tips

For some reason lists of bullet points seem to generate a lot of feedback, and garner the most interest, so here we go with a set of what I am calling “Seven Summer Super Photo Tips”

http://www.canonblogger.com/2009/06/18/seven-super-summer-tips/

Sunday, June 28, 2009

New ProShow 4.0 Training

New ProShow 4.0 Training
Take your skills to the next level with ProShow training.
Learn the latest features and techniques in ProShow 4.0 with ProShow training products. Whether you enjoy learning in a classroom environment, reading a book or following along with an interactive DVD, we've got the perfect solution for you.

Just Released!
ProShow 4.0 Workshop SeriesCheck out the updated ProShow Workshop DVDs created specifically for version 4.0. New titles and a new lower price!

ProShow 4.0 BookThe ProShow Visual QuickStart Guide will guide you through ProShow 4.0 with easy to understand examples and explanations. Get your copy today!

ProShow Online ClassesLearn ProShow from the comfort of your home or office computer. Take a ProShow Online Class and learn live via the web with an expert ProShow trainer!

Saturday, June 27, 2009

Glow Doodle: Paint with Light in Real Time!

From Photojojo

Glow Doodle: Paint with Light in Real Time!

“Photograph” literally means “light drawing”, and that’s never been clearer than with our new favorite boredom-buster, Glow Doodle.

It lets you take long exposures so you can paint with light in real time using your webcam.
Try different lights for different effects: write your name with with a mini-flashlight, fire your camera’s flash, or play with the metamorphic effect of moving while the webcam is exposing.
If you’ve never played with lightpainting before, this is an easy way to try it without setting up the tripod.

And now, what to doodle?Noodles? Poodles? Oodles of strudels?!Gotta draw something: resistance is futile.

Glow Doodle: Paint with Light in Real Time!

p.s. Browse through the Glow Doodle favorites set to see the dreamy, arty, surreal and downright creepy images other folks have made.

Friday, June 26, 2009

last minute opening Alaska Grizzly Bear & Puffin

wanted to let you know about a special opportunity. Our Alaska Grizzly Bear & Puffin trips, normally sold out long before now, have two openings for the first week (July 8-15). It's short notice, but if your summer has started and you realize that you're behind on your trip planning now is a perfect chance to catch up. You can read more about this unique safari which I have been leading and enjoying for 10 years now at: http://www.cardinalphoto.com/content/alaska-grizzly-bear-puffin-photo-safari
You can sign up on the trip info page or let us know at safaris@cardinalphoto.com or by phone at +1.650.851.8350. Hope you can make it!--David Cardinal

Comparing Supertelephoto Lenses

Comparing Supertelephoto Lenses
Posted 2009.06.24

We wanted people who have never handled supertelephoto lenses to be able to gauge their size and weight.

So, here’s a comparison of Canon Supertelephoto lenses:

http://www.youtube.com/watch?v=S59rV7luKEg

And here’s a comparison of Nikon Supertelephoto lenses:


http://www.youtube.com/watch?v=5_euUMN-V1s

Thursday, June 25, 2009

Creating Faux Bokeh Backgrounds In Photoshop

Creating Faux Bokeh Backgrounds In Photoshop - Photoshop Tutorial From Obsidian DawnThis tutorial will walk you through how to create a faux bokeh background in Photoshop. For those of you that are unsure about what bokeh is, it is a Japanese term used in photography. It is used to describe the qualities of the area of a photo that is out of focus, and is used to help draw your eye to the subject of the photograph. Some pretty cool things happen with bokeh, too. Especially where lights or heavily lighted areas are concerned. Have you ever looked at a photograph or been watching a movie, perhaps where it was dark out, and the lights in the background are all blurry, but instead of just being blurry they appear as these odd gatherings of circles and/or polygons? I didn’t notice it all that often until I started looking, and now I see it everywhere!

Wednesday, June 24, 2009

Using Your Camera's Histogram to Take Better Digital Photographs

From phototoshop roadmap: http://www.photoshoproadmap.com/links/go/6813

Using Your Camera's Histogram to Take Better Digital Photographs

The histogram is one of the best ways to check for accurate exposure in the camera, and yet it's underused by many photographers. Use this tutorial to learn to use histograms in-camera and as part of further Photoshop processing.

Tuesday, June 23, 2009

Kodak retires its iconic Kodachrome color film

http://www.walletpop.com/blog/2009/06/22/kodak-retires-film-that-captured-youth-of-baby-boomers?icid=mainhtmlws-maindl3link6http%3A%2F%2Fwww.walletpop.com%2Fblog%2F2009%2F06%2F22%2Fkodak-retires-film-that-captured-youth-of-baby-boomers

Kodak retires 'film that captured youth of Baby Boomers'
Sarah Gilbert Jun 22nd 2009 at 3:30PM

As the Paul Simon song goes, "Mamma don't take my Kodachrome away..." But Kodak is doing it anyway, retiring its iconic Kodachrome color film, effective immediately. I shoot film. (Much to the shock and chagrin of friends and casual acquaintances and family members who see the receipts for processing.) And a few months ago, I was shopping for my favorite, Kodak Portra VC. I went to photo lab after photo lab, finding only one roll of 100-speed film at a Wolf's Camera that was going out of business; and nothing at my regular haunt, Citizen's Photo. Are they retiring my film? I wondered, panicky. Finally at a huge camera store I spied a totally empty film shelf, but for a five-pack of expired portrait film. Bingo! I rushed home to make sure it was still available at B&H Photo Video, the New York-based photo store of record. Thank the gods of photography, it was still being produced.

But for fans of Kodak's famous first commercially-successful color film, introduced in 1935, the hunt will now begin in earnest. Kodak is retiring Kodachrome, saying it's too complex and expensive to produce. Other films -- such as my fave, Kodak Portra, and commercial heavyweights Kodak Max and Kodak Gold -- now account for greater than 99% of Kodak's still-picture films. Due to its complexity, only one commercial lab in the world, Dwayne's Photo, in Parsons, Kan., still processes it.The lab, which has committed to continue processing the film through 2010, has a sad message on its homepage, saying how sorry the lab's owners are to see it go. "Kodachrome was truly an icon of the 20th century and has certainly been a very important part of Dwayne's business for many years. Once it's gone, nothing will ever capture "those nice bright colors" in quite the same way," they write, referring to the Paul Simon song "Kodachrome."

Kodak will stop producing the film, which was only made at one plant, immediately and expects retail stocks will last through the fall, unless fans stockpile. As for me: I'm headed to buy a roll or two, so I can capture a bit of my film heritage before it, too, is gone.
Source

Subscribe to Walletpop

Don’t Lose Your Head When You Crop in Photoshop

From Jodi at MCP Action -- explains a very common question.

Don’t Lose Your Head When You Crop in Photoshop

Have you ever tried cropping in Photoshop to find out that if you crop to an 8×10 you lose your head? Or the head of the person who was photographed? Why does this happen and what can you do about both in camera and in Photoshop? This video will help explain why this cropping ratio sometimes makes you “lose your head” and how to fix this now and in the future.


Monday, June 22, 2009

Digital Schizophrenia

http://photocritic.org/digital-double-exposures/

One of the first things I started doing when I started shooting digital images, was thinking of ways of doing digital double exposures - adding one part of an image to another - for a greater impact of my digital shots. It turned out to be relatively simple, but carrying high impact. All it takes is suitable photos, a copy of Photoshop (or the Gimp, which is sort-of nearly as good as Photoshop, but free), and a bucket full of time…

Starting with a series of photographs taken with the camera on a tripod, to ensure that the angle doesn’t change:


Now, when you’ve put all the photos together, you get a result that looks like it could happen, if it hadn’t been for the fact that this lady doesn’t have any siblings, much less quaduplets…

Do you like this stuff? Well, have a go at it yourself!


Photo: Skate-zo-phrenia by Photocritic.org on Flickr

This site is all about learning more about photography, from the incredibly insightful (rarely) to the dreadfully mundane (also, hopefully rarely) via just about everything in between.
If this website seems a little whimsical and random, then that's because the author of this blog, who for the occasion is confusing himself by writing about himself in the third person, is slightly whimsical and random himself.
Enjoy! - Haje

Sunday, June 21, 2009

more NH

Here are a few more images from the New Hampshire lupine trip -- so many different ways to capture the beauty of nature! I never even saw that barn, nor did I shoot much with the mountains...nice to see other people's perpectives on this great place!

Hi Lisa, Attached are a few photos of the Lupine trip.It was the most time that I have spent with NHCC folks and it was really great! Joe (Hamed)


How to Shoot in Direct Sunlight

How to Shoot in Direct Sunlight

hooting in direct sunlight can lead to images that have high contrast, blown out highlights, lens flare and colors that might even look overly saturated. If you’re shooting portraits they can also lead to the ’squint factor’.

So what’s a photographer to do?
Here are eleven quick and simple tips at combating the problems that bright sunlight might bring when shooting outdoors:

11 tips from: Digital Photography School - Photography Tips. How to Shoot in Direct Sunlight

painter

I've extended the pre-ordering deadline for Painting for Photographers till the end of the month.
Come to a free sneak preview of Painting for Photographers today at 5 pm Pacific time today, June 19, 2009, and let me show you my new book!

The book and sneak preview webinars have been receiving rave reviews:
"The book is awesome, filled with great information and instruction on turning photographs into pieces of fine art.

I love the beautiful illustrations !!!!

I know I will be turning out beautiful paintings to cherish !

I am glad I pre - ordered my copy.... loved the discount !!!!
Thank you again, Karen"
-Rochelle Marks

Want to cut to the chase? Preorder at my web site, where you'll also find the link to register for the webinar:
http://artistrymag.com/

Want to turn your photos into paintings right away?

The June 2009 issue of Artistry Tips and Tricks covers painting flowers and the May 2009 issue shows turning landscape photos into paintings, including how to know when to change the photo when it isn't working.

The issues are available for just $11.25.

See the complete directory of Artistry Tips and Tricks issues here:
http://www.artistrymag.com/docs/tipsall.html

Saturday, June 20, 2009

Fab Five Photoshop shortcuts

For something new here on the blog, I thought it might be fun to share some of my favorite keyboard shortcuts in Photoshop. The idea here is that people will share their top five in the comments area and we can get an idea of many more keyboard shortcuts than we ever could have found out on our own (unless of course you are some Photoshop guru like The Photoshop Guys and the trainers/instructors of the world that do this for a living and already know all the shortcuts.)

So, anyway, here’s my Friday Fab Five Photoshop shortcuts and what they do:

CMD/CTRL+J = duplicates your existing layer

CRTL+ALT+SHIFT+E = Stamp Visible This takes all your visible layers and merges them onto a new layer. Increases file size, but very cool

CMD/CTRL+’ = (yes, that’s apostrophe) - it activates the grid in your preferences. Since my grid is set to every 33.33% and one subdivision, it basically shows a Rule of Thirds grid overlay on my images - very handy for compositional cropping

Left and right brackets - decrease and increase your active brush, whether it’s for clone stamp, healing brush, eraser, history brush - whatever

Alt+Eyedropper = you can drag the eyedropper outside of Photoshop to sample a color in another application (great for color matching)

So, those are my five for this friday - what are yours? Sound off in the comments!

http://www.canonblogger.com/2009/06/19/friday-fab-five/comment-page-1/#comment-2367

Floating Windows Instead of Tabs

In Photoshop CS3 if you open multiple files they float in the window by default. In CS4 if you do the same the files open in tabs by default. If you want to float the files in the window you have to go to Window > Arrange and select Float All in Window. Is there any way of setting the default to float all?

There most certainly is a way to have images open in floating windows rather than tabs by default in Photoshop CS4. Simply go to Edit > Preferences > Interface (Photoshop > Preferences > Interface on Macintosh) and turn off the Open Documents as Tabs checkbox. With this option turned off, opening an image will cause it to open in a floating window.

Also, for situations where you might want to use other than the default setting, the Arrange Documents button on the new Application bar provides faster access to the menu commands you would otherwise utilize. Options on this popup allow you to float all windows, consolidate all into tabs, or arrange the windows in a variety of configurations so you can see multiple images at a time but still have them organized into tabs.

Details on becoming a member can be found here:www.timgrey.com/ddq/

Friday, June 19, 2009

more from NH

Anyone who was up in NH with us last weekend please send a few photos -- we would all love to see them!

Rick Sereque sent these. THANKS!
Love the use of color and composition! wow!


Alltop is an “online magazine rack” of popular topics.

Alltop is an “online magazine rack” of popular topics. We update the stories every hour. Pick a topic by searching, news category, or name, and we’ll deliver it to you 24 x 7. All the topics, all the time.

From Scott Kelby

I’ve talked about Alltop.com before (which is basically a site that does a very clever job of gathering blogs about specific topics and it puts them all on one handy page, but that’s just part of the story). They call it, an “online magazine rack” that they update every hour.

Anyway, just recently, they introduced a feature called “MyAlltop“ where you can set up your own Alltop page, with your own favorite blogs on it. So, I put one together with blogs about Photoshop, Photography, the Mac, and other stuff I check each day, and of all the things like this I’ve tried (various RSS readers, blog aggregators, Google-this, Yahoo-that, etc.), this is the quickest to use and easiest to set up.

One of my favorite features of Alltop is that you can move your cursor over a headline and it shows you the first paragraph or so from that post, so you can quickly decide if you want to click the link and read more.

It’s free to sign up, and once signed up, you just search by topic (Photoshop for instance), and it shows you a list of the Photoshop blogs they follow. To add one of those, you just check the box, and keep on choosing blogs until you’ve got your own custom page set up. You can also reorder the blogs in the order you want them to appear by just dragging and dropping. Anyway, it’s free, and quick, and definitely worth a try. Here’s the link to set-up your own page.
Let me know what you think after you’ve tried it for a few days. (If you want, you can check out my own page by going to my.alltop.com/scottkelby)

Thursday, June 18, 2009

Photoshop Lightroom 2 LIVE with Scott Kelby & Matt Kloskowski

Photoshop® Lightroom® 2 LIVE with Scott Kelby & Matt Kloskowski


New York, NY
Wednesday, July 22 2009
Jacob K. Javits Convention Center
Room: Hall 1E 6-10Place: 655
W 34th St New York, NY 10001 Phone: (212) 216-2000


Get ready for the best Photoshop Lightroom training on the planet! Two of the world's top Lightroom experts, Scott Kelby and Matt Kloskowski show you the insider's view of Lightroom. From Start to Finish, from image capture to final print - you'll see it unfold right in front of you, as you learn step-by-step how to take control of your digital photography workflow.This seminar will teach you how to take your photography to an amazing new level of productivity, efficiency, and fun with real world insider techniques that will make your life easier, and free your time so you can do what you really want with your photography.Scott and Matt begin their day with a live photo shoot then take those images into Lightroom so you see the entire process from beginning to end. You'll learn how to set up Lightroom the right way from the start to save you hours of wasted time and frustration. You'll learn how to edit your RAW, TIFF, and JPEG images like a pro, and use Photoshop and Lightroom seamlessly to dramatically increase your productivity and enhance your workflow. They'll also show you the step-by-step process for setting up and customizing a professional presentation of your photography for clients that highlights your creativity and the quality of your work. And, teach you exactly how to set up your system for printing success, and automate the whole process, so you can just sit back, print, and get amazing results that look exactly the way you wanted them to, plus much, much more.

Setting Up Photoshop Lightroom: The Right Way from the Start 10-11:15 A.M.
We start the day with a live photo shoot, and then we take those images into Lightroom so you see the entire process from beginning to end. You'll learn how to set up Lightroom the right way from the start to save you hours of wasted time and frustration. You'll learn Scott's new streamlined workflow, using Lightroom 2's new features, so you'll work faster and more efficiently, plus you'll learn how the pros manage their image library, how to make the most of built-in automation tools, and dozens of shortcuts to keep you way ahead of the competition.

Editing Your RAW, TIFF and JPEG Images like a Pro 11:30 A.M. to 12:30 P.M.
Lightroom lets you process RAW, TIFF and JPEG images using the same tools, but it's what you do in the Develop module that makes all the difference in the world. You're going to learn which tools to use when, which ones to avoid, and how to unleash the power of Lightroom 2's Adjustment Brush in your workflow. You'll see exactly what to do, and in what order, to work as efficiently as possible, and you'll learn the latest techniques in sharpening, adding midtone contrast, adjusting individual areas of your image, and the latest techniques for making your images look their very best.

LUNCH BREAK12:30 to 1:30 P.M.

Using Lightroom 2 with Photoshop 1:30 to 2:30 P.M.
Lightroom 2 lets you handle an amazing amount of image editing, but there are times where you're going to need to jump over to Adobe Photoshop for things Lightroom wasn't designed to do. In this session, you'll learn when and how to use Lightroom and Photoshop together for a seamless workflow that gives you the ultimate in power and speed. You'll learn exactly how these two applications work in concert to give you incredible creative potential - from serious retouching to adding special effects. Plus you'll learn some very cool Photoshop techniques along the way.

Showing Your Work To the Client 2:45 to 3:45 P.M.
Lightroom 2 has some very powerful tools for photographers to create online proofs and do client presentations, and in this session you'll learn the step-by-step process for setting up and customizing a professional presentation that highlights your creativity and the quality of your work. Plus, if you've ever wished you had a really effcient way to let your clients, friends, or family view your work on the Web, you'll be amazed at what you'll learn in this eye-opening session.

It's All About the Print! 4:00 to 5:00 P.M.
The printing features of Lightroom 2 make it arguably the best program for printing photographic images ever. In class, you'll learn exactly how to set up your system for printing success, and automate the whole process, so you can just sit back, print, and get predictable results that look exactly the way you wanted them to. We'll cover everything from setting up Lightroom's color management to configuring the print settings so you'll get quick, reliable results, while side-stepping some common printing problems. Scott wraps up the day by bringing it all together by showing you the full beginning-to-end process; you'll see it all, from a live commercial shoot in class, taking the images into Lightroom, sorting, process, proofing, and even outputting the print right in class. Seeing this real world workflow come together live in class really "makes it stick" and brings it all together to make this incredible day of learning a career-changing experience.

Great Portable Blind for Photographers


I've owned several different portable blinds and they've all been a compromise. I just got a new one and have found it much better than previous ones I've owned so I wanted to pass the information along to you...The Guide Gear Pro Series Pop-up Blind sold by Sportsman's Guide for a mere $50 is a great solution for an easy to move and even easier to set up blind. Despite folding into a very manageable size it expands to 5' x 5' and is a nominal 5'8" high (realistically think of it as 5' high). It is light enough that I can set up my tripod, camera and chair and then simply lift the blind over them if I don't feel like bending over to put everything in the blind after it is set up. It has a nice large opening in the front and you have some flexibility on opening large windows or just screens on the side. The back features a large door which makes it relatively easy to get in and out.

The blind comes with stakes and tie-downs which you'll need if there is any wind and the 14 pound blind will be quick to blow away otherwise. The material seems quite rugged and the blind well made, although since I've only had it for a few weeks time will tell.

To get it re-packed, it is a little bit of a leap of faith. Basically it works like those spring loaded windshield protectors. You sort of twist it around and the two sprung loops turn into each other. There is a large diagram but it still takes a little fiddling the first time.

If you need a portable blind (it is 14 pounds, so it isn't a substitute for a tiny "hat blind" if you need something for backpacking) that sets up quickly at a good price, check this one out. If you decide to get this blind or if you have other favorite blinds or photo accessories, let us know!--David, http://www.nikondigital.org/content/content/great-portable-blind-photographers

Wednesday, June 17, 2009

Rescuing Photos

I had this conversation last night and thought that I would re-blog something that I have talked about in the past.

What do you do when a CF card fails?
Freak out? Hyperventilate? Swear? Cry?
No!
You will have practiced and know that you can recover these images.

If you reformat a card, or if a card fails -- STOP. Do not take any more photos. Use the rescue software.

Kind of life a firedrills -- try a practice run and rescue your photos. Do this to learn how to rescue your images when your adrenaline isn't running and you are freaked out because you formated your memory card before you downloaded or your get an error message from your memory card.

It's simple to try -- Format your memory card and then run the software and rescue your images.

PhotoResuce (the world's best image recovery software) has been updated to version 3.1.10. In addition to the usual RAW file format updates, this version allows the extraction of large thumbnails from RAW files. As raw files of top DSLRs grow bigger, so do the embedded JPEG (or even small raw) thumbnails. While their quality obviously is not as good as the raw files, they can save a shoot when the raw data is damaged beyond recovery.

This option is available in the option screen of the advanced recovery and is disabled by default.

This 3.1.10 update is free for all customers who have purchased their version after Jan 1st, 2008 and $19 for others. Please note that registered versions of PhotoRescue never expire. Customers who have lost their copies ofPhotoRescue and do not want to upgrade are still be able to download 3.1.9 (and also 2.1.x) from the Photorescue website.

http://www.datarescue.com/photorescue/

http://www.robgalbraith.com/bins/content_page.asp?cid=7-9318-9737

PhotoRescue is the best and fairest picture and data recovery solution for digital film - sd cards, compact flash, memory sticks, microdrive, etc... Featuring innovative recovery algorithms, PhotoRescue displays reliable previews of the recoverable pictures. What you see is what you recover, both on the Windows and on the Apple Mac OS X platforms. PhotoRescue has been awarded 4.5 stars by PCMagazine. PhotoRescue is available in three different versions.

Please note that ANY storage is subject to a problem. For your hard drive the general consensus is not IF your hard drive will fail, but WHEN it will fail.

Yes, memory cards can also fail.
I have had a three of cards fail.
Twice I have also formatted over photographs that were not yet downloaded to my computer. When we were on our honeymoon we somehow reformatted a CF card that had not been downloaded. Argh! But all was not lost. I was prepared for this!

How?Well, I had practiced this scenario, at home, under no stress. I HIGHLY recommend that you run through the recovery process under non vasodilating conditions because when it happens your adrenaline will be running and it will be much easier to stay calm knowing that you know how to rescue.

So, if you reformat a card, or if a card fails -- STOP. Do not take any more photos. Use the rescue software.

I have tried three programs -- they are free and you buy them if they work for you (they provide a free trial to see that they did indeed rescue your images). Sometimes one program works better than another.
You can also try the one that is for your card type (Sandisk, Lexar, etc.) (some cards come with rescue software for free).

Also note that most CF cards also have a lifetime guarantee on them. I have used this twice, once for a Sandisk 512K card about 6 years ago and once for a 4 GB Sandisk card in 2008. Sandisk replaced the card both times free, including no shipping charges.

White Mountains Outdoor Workshop & Adam Jones Indoor Photography Workshop

My name is Robyn and I've been working with Adam Jones who is one of Canon's Explorers of Light and talked last year at the NECCC. Susan Mosser of the Greater Lynn Photographic Association said I should email your group and send the info about a White Mountains Workshop (which I will be doing with Don Toothaker whom you may know from Merrimack Valley Camera Club) in October followed by Adam Jones doing a weekend indoor workshop on working with photos, postprocessing and so on.
If you have any questions you can reply to this email or feel free to call anytime at 978-929-9331 - I live in Acton, Mass.Thank you for your time and consideration,Robyn

White Mountains Outdoor Workshop and Adam Jones Indoor Photography Workshop
October 7th to October 11th 2009

White Mountain Outdoor Workshop
Want to go to one of the best places in the United States to photograph fall foliage? The White Mountains in New Hampshire is a photographer’s dream and well known for its’ spectacular colors during the autumn season. From early Wednesday, October 7th through the afternoon of Friday the 9th, 2009, come join photographers Robyn Bright, Bob Buyle and Don Toothaker on this photo workshop that everyone from beginners to advanced photographers can enjoy. We’ll be exploring the Franconia Notch and Conway areas along with the incredibly scenic Kancamagus Highway. Mountains, rivers, ponds, waterfalls and of course the vibrant color of the autumn leaves will be captured in this photo workshop at one of the most beautiful locations in New England. Maximum of 25 people.

Adam Jones Indoor Workshop
Once photos have been taken, downloading, sorting, storage and especially processing can be extremely time consuming. Who wants to spend more time in front of a computer than behind their camera? The answer is to be sure to take the best photos to begin with so processing becomes a breeze and to learn from an expert photographer the fastest and more advanced ways to do post-production work. Adam Jones, one of only 100 premier photographers in the world that is a Canon “Explorer of Light”, will be coming for a two day weekend workshop in the North Andover area of Massachusetts to teach about storing, sorting and processing your photos. This workshop will immediately follow the White Mountain Outdoor Workshop above that Adam will be visiting as well. Anyone who is a beginner to advanced photographer can learn a great deal from this workshop. You can sign up for either one or both days depending on your skills and what you wish to learn.

Day One of Adam Jones Indoor Workshop:
On Saturday, October 10th, Adam will be discussing in the morning how to take better photos by: getting correct white balance, using different camera modes, understanding histograms, knowing the importance of tripods and lens choice, and other topics so that you get the best photo to start with which means less processing time. The afternoon will be spent with Adam teaching about ways to effectively download, sort and store your photos and setting up Photoshop correctly in terms of Preferences, Color Settings, Brushes, Palettes and so on. Then he will process several of his images from beginning to end explaining each step. Some of these image-enhancing steps include how to use Curves/Levels, Shadow/Highlights, Selective Color, Hue and Saturation, and Sharpening for printing.

Day Two of Adam Jones Indoor Workshop:
On Sunday, October 11th, Adam will talk about more processing work and Photoshop techniques will be addressed such as Layers and Layer Masking, creative Dodging and Burning, Blending Modes and making precise selections with the pen tool and others. In the afternoon, more advanced techniques using some Photoshop and different software tools will be taught including creating and blending HDR (High Dynamic Range) images for handling extreme contrasts, Helicon Focus for unlimited depth of field, tips and techniques for stitching panoramic images, and NIK software such as Viveza, Sharpener Pro 3, Silver Effects Pro and others to really bring out the best in your photographs. If time permits in the afternoon, Adam will show some of his best photos taken in the USA and around the world. Questions will be welcome anytime during any of the above workshops.

Workshop Fees and Other Considerations:

Pricing for the White Mountains and Adam Jones Workshops*:
White Mountains Outdoor Workshop Only: $295.00
Adam Jones Indoor Workshop One Day Only: $ 95.00
Adam Jones Indoor Workshop Both Days Only: $170.00
White Mountains Workshop + One-Day Adam Jones Workshop: $350.00
White Mountains Workshop + Two-Day Adam Jones Workshop: $395.00

Workshop fees do not include lodging, transportation or meals. Arrangements have been made with a hotel in New Hampshire on the Kancamagus Highway in Lincoln for anyone who wishes to stay from Wednesday night the 6th (as we will be heading out very early on the 7th) until the 9th of October for a room with two beds for $109 to $119/night for one or two people. There will be a maximum of 25 people for the White Mountains Outdoor Workshop. Adam Jones’ indoor workshop will be held in or near North Andover, Massachusetts. Deadline for sign up on White Mountains is July 15th and for Adam Jones workshop is August 30th. Note that any workshop above may change itinerary as needed.

*Note that you will save 10% or more if you sign up for more than one workshop!

If you have any questions or wish to sign up for either or both workshops, please call or email Robyn Bright at 978-929-9331 or rbrightsun@yahoo.com or Don Toothaker at 978-469-9569 or detphoto@comcast.net Thank you!

The Photographers:

Adam Jones is an internationally recognized photographer specializing in travel, nature, and wildlife. Jones’s award-winning photography has been widely published in magazines, posters, calendars, books, and in national advertising campaigns for clients such as Canon, Ford, Eddie Bauer, Miller Beer, and Coldwater Creek. Adam’s publication credits also include: National Geographic, Life Magazine, National Wildlife Federation, Audubon, Sierra Club, Disney, Hallmark Cards, and hundreds of textbooks plus seven of his own coffee-table and instructional books. In 1995 the BBC Wildlife Photographer of the Year contest honored Adam by selecting one of his images from over 19, 000 entries as the winner in the “In Praise of Plants” category. He has taught for Canon, Popular Photography & Imaging, Maine Photographic Workshops, Rocky Mountain School of Photography, and Great American Photography Workshops. Adam is noted for his enthusiastic down to earth approach and his ability to communicate effectively with all skill levels. You can see some of his amazing photographs at: www.adamjonesphoto.com

Robyn Bright is a true New Englander that loves to take photos in the US and all over the world on the land and even under the sea. She specializes in nature, wildlife and pet/fish photos that have been used on magazines, product labels, ads and websites mainly for the pet industry. Her photos have been included in a textbook on small animals and multiple times in the largest pet industry trade publication and their fish supplement. She has been teaching adult education photography courses for over five years and has put together workshops in New England and Arizona. Robyn’s mentor and friend for almost ten years has been Adam Jones, who she has traveled with to different parts of the US as well as Africa and China. She will be a speaker at the NECCC this summer.

Bob Buyle enjoys travel, nature and wildlife photography with a specialization in city landscapes and commercial architectural interiors especially in the Chicago area where he lives. He has won many of his own and regional camera club competitions. Bob’s work has been purchased from numerous fine art galleries and stock agencies, and has been seen in national advertising, a well-distributed social studies textbook, and post cards that are being offered at high quality, competitive locations such as the Sears Tower in Chicago. Bob has worked in a group and individually with Adam Jones for many years and has traveled with Adam around the US and Africa. He has been praised numerous times for his helpful and caring nature assisting individuals out in the field on workshops. Please check out his stunning photos of cityscapes, nature, wildlife, sports, travel and other subjects at his website: www.robertbuylephotography.com

Don Toothaker is an award-winning photographer that captures a wide range of subjects including weddings, portraits, events, travel and nature. A life long resident of New England, his images have been published in nationally known magazines as well as local periodicals. Don’s clients have included Donald Trump Enterprises, the Tiger Woods Foundation, The Wounded Warrior Project, Dunkin Donuts, the Boston Red Sox, the New England Patriots, the Professional Golf Association, Bank of America, and other varied venues. Primarily self-taught, Don’s infectious enthusiasm and passion for photography is obvious when he works with groups and individuals in workshop settings. See some of Don’s fabulous and deeply moving photos at: www.toothakerphoto.com

Learning about Exposure - The Exposure Triangle


Post from: Digital Photography School - Photography Tips.
Learning about Exposure - The Exposure Triangle

Bryan Peterson has written a book titled Understanding Exposure which is a highly recommended read if you’re wanting to venture out of the Auto mode on your digital camera and experiment with it’s manual settings. In it Bryan illustrates the three main elements that need to be considered when playing around with exposure by calling them ‘the exposure triangle’. Each of the three aspects of the triangle relate to light and how it enters and interacts with the camera.

The three elements are: ISO, aperture and shutter speed. It is at the intersection of these three elements that an image’s exposure is worked out. Most importantly - a change in one of the elements will impact the others. This means that you can never really isolate just one of the elements alone but always need to have the others in the back of your mind

read the rest of the article here: Learning about Exposure - The Exposure Triangle

Monday, June 15, 2009

New Hampshire Sugar Hill

18 CT photographers ended up in Sugar Hill NH this weekend. Linda, Joe, Harold & Jackie, Antoinette & Bernie, Paul & Carmel, Art & Ann, Bill, Rick & Linda, plus Tom & I (it was actually our anniversary and we got a lava cake complete with singing after dinner one night -- thank you everyone for celebrating with us and for the cake! )

Here are our photographs from this weekend. If anyone else from the trip want to send me some to post here please do!

This was the only moose that we saw...


but we did see a variety of other wildlife: some bears, deer, turkeys, a porcupine, a common snipe (right across from Polly's pancake parlor all day), bluebirds with babies, a great blue heron, red winged blackbirds (with babies), a kingfisher (caught a fish and beat it on a branch before eating it), lots of cedar waxwings, a pair loons (very close one morning), etc.


The lupine were not quite as plentiful as the last two times that I have been there, but there were LOTS of blooms and many, many colors and lighting patterns. The wagon wheel in the Sugar Hill Field was gone (I read that it was gone last year) -- at Saturday dinner I asked the other members all to chip in $5 and we could buy a new one from the antique store and leave it there but most were going home early Sunday so I had no takers -- maybe next time, nothing wrong with creating a photo op!


There were a few opportunities for photographing right at the roadside (or even sometimes from a parked car)...this particular place had a lot going on!


I was not with Art when I shot this, but I cannot imagine that he did not stop for this double entrendre of the CROW scarecrows!


And Tom turned around so we could take the one of this poor man...


Here is Harold demonstrating the correct photographic techniques for getting a perfect "30" picture... yes usually a cable release and a tripod are required. Tom said to me at one point on this trip "time to get the quatrapod out" ??? His two legs plus the three tripod legs.


The lupines were great, and the weather quite cooperative (despite some bad forecasts for Sunday but we only had light mist (we photographed anyway -- great light and color saturation) and the afternoon gave rise to blue skies and fluffy white clouds. Misting, just bring one of those $1 plastic rain ponchos -- one for you and one for the camera and you will get some great photos!


There is still plenty of time to get up to NH to photograph these wonderful flowers. I follow these wonderful flowers even the years that I am not lucky enought to make it up there. http://www.harmanscheese.com/lupinephotos.html

June and July Photo ops

June 20 White Farm Open House, Litchfield, CT

June 20 Paragon Jousting at Shakespeare Family Renfair, Craryville, NY

June 20, 21 New England Pirate Faire, Stage Fort Park, Gloucester, MA

June 20-21 Annual Elizabeth Park Rose Weekend Festival, Hartford, CT

June 21 Open Cockpit Day, New England Air Museum

June 27 Pageant of Trolley Cars, Shoreline Trolley Museum, East Haven, CT

June 27-28 Quonset point Airshow featuring both the Blue Angels & the Snowbirds, Quonset, RI

July11 Riverfest, Hartford

July 17 Deep River Muster Tatoo 7pm

July 18 Deep River Muster Parade 10am

Fay Sirkis lecture FREE

A Photo Painting Journey Through the History of Art with Fay Sirkis

“Impressions of Art - A Photo Painting Journey Through the History of Art” with Fay Sirkis June 24, 2009Laurel View Country Club 310 W Shepard Ave Hamden CT 06514 Map it
5:00 PM Social Hour6:00 PM Dinner7:00 PM Lecture

Register online

Register by mail

Registration reminder:1) Indicate on the registration form “Nonmember” (if registering online, type “nonmember” in the blank box provided)2) Indicate “guest of member: Lisa & Tom Cuchara” (with member’s name)

June 24 Meeting “Special Invitation”Nonmembers Save $50 - $75!

Wednesday, June 24th Evening Program featuring Kay Sirkis

Details: You are invited to join CPPA members this night only at the member price:

Dinner and lecture….$25 (Save $50)

Lecture…………. FREE (Save $75)

Fay Sirkis lecture FREE“Impressions of Art - A Photo Painting Journey Through the History of Art” with Fay Sirkis June 24th

Fay Sirkis is an internationally-recognized portrait artist, photographer and instructor. She speaks at conferences and seminars in the United States and Europe. Fay is on the advisory council of Corel Painter, and is a Beta tester for Adobe Photoshop and Corel Painter, and was instrumental in the launching of the latest releases of the programs. She is a Corel “Painter Master” whose work is featured in Corel’s Art Gallery. Her Paintings appear in numerous ad campaigns for both Canon USA and Corel.

Fay is part of the “Dream Team” Instructors that teach at the Photoshop World Conferences.Her tutorials on “Photo Painting” have been featured on the cover of many magazines, including Photoshop user. She is now star of her own DVDs and has teamed up with NAPP to release her new DVD series “A Celebration of Art”. She is best known for her simplistic way of teaching, making the learning curve in the digital world easier to master.

Her commissioned portraits and paintings are held in private collections internationally, andare exhibited in museums and art galleries. Fay is the founder of Fays Art Studio, a high-endcommission portrait painting studio, as well as a digital art training and consulting firm basedin New York.

An accomplished portrait artist, photographer and instructor, Fay provides her students with a simple recipe to transform photos into beautiful paintings. Learn how to paint like a master with Fay Sirkis as she shares the secrets and techniques behind her signature style of photo painting. To see more of Fay’s work, please visit www.faysartstudio.com.

This evening seminar is for the photographer, fine artist, and hobbyists who wish to create breathtaking, hand-painted looking works of art from their photographs using Fay’s easier than ever signature style of Photo Painting!For centuries, artists have been using the “photograph” as a reference for their paintings. Photo Art, referred to today as Photo Painting, was, and always will be, a sought after art form, only accomplished differently at different times in history, according to what tools were available atthat specific time period. Photo Painting is a simulation of the painting workflow, tools and brushes, that is based on the traditional painting styles of the Old Masters and the lessons thatwe learned from Art History. Before the invention of the photograph/camera, some artists were using mirrors and lenses to capture the image on canvas, trace it in great detail and proceed to paint with amazing realism; some say that is how Leonardo Da Vinci painted the Mona Lisa.The history of art dates back to the beginning of mankind, way back to the cave man.

Join Fay on a journey back in time as she takes you through centuries of art history to see how painting has evolved into what we now call the digital era, and how we use the art of Photo Painting to transform our photographs of portraits, landscapes and more into priceless hand painted looking Corel Painter to replicate the traditional styles of the Old Masters. “Imagine taking a paint brush and dipping it into the photograph, transforming pixels into brushstrokes; the result is magical.”

Fay will demonstrate the process behind interpreting high key portraits into watercolor paintings and low key images into canvas oil paintings. From Rembrandt to Monet, from photo Realism to Impressionism, come explore the world of possibilities behind transforming yourpictures into oils, watercolors, acrylics, chalks, and more. From retouching your images AdobePhotoshop, in preparation for the painting, using the Digital Dark Room, to applying your paints and blending them in Corel Painter, you will discover how to master your “Impressions of Art.”

Don’t miss Kay Sirkis on Wednesday, June 24 at the Laurel View Country Club for the final Quarterly Program for the season.

The PhotoshopSupport.com Team

The June newsletter offers some discount coupons for Nik and onOne plugins, some new tips and tricks, some free Photoshop brushes, and some super summer deals from Adobe! Have fun! Follow the link below to read the June 2009 Newsletter online. http://www.photoshopsupport.com/newsletter/09-06.html

The PhotoshopSupport.com Team

Adobe has a Summer Suite Deal. For a limited-time you can save $100 when you upgrade to Creative Suite 4 from an earlier version of Adobe Creative Suite, Production Studio, or Macromedia Studio. Ends August 31, 2009.

Plus, Adobe is offering up to 80% off to all students and faculty in the Adobe Education Store with valid identification.

Sunday, June 14, 2009

8 Daily Photo Blogs That Provide Inspiration

Post from: Digital Photography School - Photography Tips.8 Daily Photo Blogs That Provide Inspiration

8 Daily Photo Blogs That Provide Inspiration

For me, inspiration is a big part of photography. On days when I know what I want to shoot and wake up feeling really into it, it’s easy to grab the camera and go. But we all have those days when either life distracts us away from the camera or we just don’t feel creative enough to take a few pictures. While everyone needs down days from any activity, if you’re in need of some inspiration to snap you out of a non-photo funk, here are some great websites with RSS/Email feeds to daily photo inspiration.

Ron Dubin Photography
Ron’s feed contains photos from around the world. Many shots are from Bolivia but also contain a variety of subjects, from horse races to glacial lakes to interesting takes on patterns and rhythms. His feed also contains other posts from his site, including sale offers on his photography. Excellent travel photography blog.

Everything Everywhere
Gary has been traveling the planet for over two years straight, and that says a lot for the content of his site. His feed is a mix of daily photos from over 75 countries and travel posts. His daily photos are always accompanied with full descriptions and he has a penchant for visiting World Heritage Sites, helping you discover and visit some amazing locations around the world from the convenience of your computer.

Enoxisureka Photo Blog
What an eclectic mix! When I initially stumbled on this photoblog it immediately consumed a half hour of my time in the blink of an eye. A wide variety of subject matter and content, this dedicated photoblog concentrates on higher contrast, daily subject matter from a number of interesting angles. A great blog to snap out of the daily grind.

New York Daily Photo
As the name describes, this blog is centered on the Big Apple. Brian Dubé writes full entries with each post and usually includes multiple photos from the happenings around New York City. Full of life and color, his posts expose the daily life and extraordinary happenings around the city.

Frame Not Included
Erik, Inge and Jørgen started this daily photo blog from Oslo, Norway. While a number of the images are from Norway, the site boasts a wide variety of travel and daily life photography. Having three photographers on one site lends itself to an ever changing take on the world around us.

Paris Daily Photo
Eric’s posts are full of life around romantic (and sometimes not so romantic) Paris. He brings a slice of the city to his readers every day complete with full descriptions of the location and what life is really like in the City of Love. He also welcomes requests for subject matter.

The Carey Adventures Photo Of The Day
This would be my own daily photo blog. Shots are taken from travels around the USA as well as Nepal, Ireland, Peru and other locations. In the past I have featured guest photographers for a week and will do so again in the Fall.

San Francisco Daily Photo
Shot daily and posted the next day, Manuel keeps his photo blog active and original. Originally from France, his content is centered on daily travels through San Francisco and presents the city in a very unique light. Even long time natives of SF comment on how varied and undiscovered his subject matter can be.

And More! There are far more daily photo blogs than this one post can handle. No matter the source, finding a few good daily photography inspirations can help keep you behind the camera with a passion to make great images.

Post from: Digital Photography School - Photography Tips.8 Daily Photo Blogs That Provide Inspiration

Saturday, June 13, 2009

SHARPNESS TESTING

From Art Morris Birds as Art

Back issues of all BAA Bulletins can be found in the Bulletin Archives which may be accessed from the home page at http://www.birdsasart.com/. If you photograph birds then you should be getting his emails! He is THE bird guru.

SHARPNESS TESTING

I receive several e-mails each week from folks who state that this camera does not focus properly or that that lens is not sharp. In 99% of the cases I am sure that operator error rather than equipment malfunction is the cause. That said, on rare occasion, folks using quality equipment from Canon of Nikon do experience real problems with focusing accuracy.
If you are handholding, please do not complain about unsharp images. I was walking around in Sabine Woods late yesterday afternoon. It was cloudy dark. I was working at ISO 800 with shutter speeds of about 1/60th second and even slower at times. There were two folks walking around handholding 500 f/4 lenses; they might as well have gone fishing as there was no way that they could create a sharp image without a tripod in those conditions. It is best to work on a tripod at all times when using your longest lens (unless you are handholding for flight or for action).

Another factor to consider is that most of the folks who write complaining of unsharp image are using cameras with 1.6X or 1.5X multiplier effects. They need to realize that these cameras multiply vibrations and movement caused by operator error by the square of the equivalent focal length!

If you are using a tripod you need to check and note the shutter speeds of your unsharp images. I had one guy on an IPT complaining that none of his images were sharp. I checked his set-up and saw that he was working in near darkness at ISO 100 with shutter speeds in the 1/8 to 1/15 second range. Making sharp images with a long lens at such slow shutter speeds is simply not possible for most folks. When working at long effective focal lengths I am confident that I can make sharp images down to 1/60 second as long as I have time to lock the tripod head and provided that the bird does not move during the exposure. With the prime lenses alone, I can usually get down to 1/30 second. With the relatively new Canon 800mm lens and its new 4-stop IS system, I have made some sharp images at shutter speeds as slow as 1/6 sec.

Below are two simple tests to determine if you have faulty equipment.

#1: Tape a sheet of newspaper to a sunlit outdoor wall on a relatively still day. Make sure that it is as taped down as flat as possible. (A magazine cover with fine print or a plastic or cardboard test chart are of course better options.) Mount your telephoto rig on a tripod. Lock down the tripod and the lens collar. Make sure that you are beyond the minimum focusing distance of your lens and that the distance range switch (if your lens has one) is set to full. Make a few images at the wide open aperture using both One-Shot or AI Servo with Canon gear or Single (S) or Continuous (C) with Nikon. Then do the same thing at f/8. As long as the wall is sunlit you will have more than enough shutter speed to know that your focusing issues are not caused by too-slow shutter speeds. Now download your images and check them for accurate focusing. If all of the images are sharp, then you can be sure that your unsharp images were being caused by operator error.

#2: Stand well off a somewhat busy road with the sun angled so that the approaching vehicles are coming right down sun angle. Use the wide open aperture and choose an ISO that results in shutter speeds greater than 1/2000 sec. Choose AI Servo (Canon) or Continuous (Nikon) and select the center AF sensor. As the cars approach, place the central sensor on the license plate and hold the shutter button down once focus is acquired. Even this simple task requires some practice so be sure to take lots of images. Download the images and sort them into two groups: sharp on the license plate and unsharp on the license plate. Now using an application that allows you to see the position of the active focusing sensor, in this case the central sensor, note the position of the sensor in the unsharp images. If the sensor is consistently on the license plate and the images are unsharp, then you likely have equipment problems. You can repeat this test with various camera bodies and various lenses in an effort to determine the cause of the problem. When you are pretty sure that you have an equipment problem it is best to send the gear to the manufacturer along with a CD of the test images.

In most cases, folks will learn that their equipment is perfectly fine but that their poor sharpness techniques are the cause of the unsharp images. Do also realize the importance of subject movement. While working at the Cozad Ranch probably well more than half of my images were unsharp. This was due in most cases to subject movement. In other cases, the unsharp images were a result of the AF system being unable to maintain sharp focus on the tiny songbirds as they leaped off of their perches. It is important to understand and to realize the limitations of our equipment.

Friday, June 12, 2009

Observations on nature and photography

To view some really good photography take a visit to http://www.scarthphoto.com and view Linda and Roberts numerous photo galleries. They both have a great eye and their techniques are just as impressive. Their travels have brought them many wonderful places and provided them with great material. Drop them a line to let them know what you think of their work.

Thursday, June 11, 2009

ColorMunki Photo

ColorMunki Photo

How Important is Color To You?

This is the One Tool for Complete Color Control.

- Profile monitors, printers & projectors- Features an painless-to-use guided setup- Automatically sync across applications with AppSet™- Send proofs with confidence with DigitalPouch™

Your new best friend for matching prints to display with color perfection. Ideal for wedding, portrait and event photographers – or any passionate advocate – this completely integrated color control solution delivers the latest technology to calibrate your displays, projectors and printers for accurate color matching. It’s also loaded with new color creation and communication tools that allow you to send your images with DigitalPouch™ and create unlimited color palettes! So whether you work on a PC or Mac, ColorMunki Photo is the innovative new way to bring images from screen to print accurately, simply and affordably.

Take advantage of a $50 mail-in rebate!Final Cost: $429 from Tallyn's
Available Now or call (800) 433-8685

Wednesday, June 10, 2009

FREE Color Workflow Webinar

Your prints CAN match your monitor! Learn to move beyond guess-and-test printing during a FREE color management webinar on Tuesday, June 16.
Led by X-Rite's Joe Brady—one of our favorite color workflow lecturers—and featuring the innovative ColorMunki Photo, this online seminar will provide all the info you need to guarantee accurate color in your photos. Using a minimum amount of hardware and software, you'll learn to easily produce great prints the first time.
Whether you're a professional or an enthusiast, this webinar will provide crucial information on the color workflow process.
Attend the webinar and also be eligible for a $60 instant rebate on ColorMunki Photo. Details will be provided at the end of the June 16 session.
Space is limited, so register now!
Topics covered:
Matching monitor to print (calibration and profiling)
Obtaining consistent color in-camera
Creating and using custom profiles
Soft-proofing in Photoshop and other applications
Profiling digital projectors
Color Workflow for the PhotographerDate: Tuesday, June 16, 2009 - 2:00-3:00 p.m. EDTCost: FREE
Register Online Today »

Light Fantastic Photo Tours

Light Fantastic Photo Tours has some delightful tours coming up in June and July to start your summer fun with your camera. New for us are Saturday Camera Walks in various San Francisco neighborhoods.

Our Lavender Tours were sold out in 2008 so don’t miss out on this aromatic and photogenic day. Hot Air Balloons, Fireworks, and Flowers also keep us busy this summer. For fall we have many colorful offerings including our favorite fall color locale: Maine and Acadia National Park. For those of you on the West coast you won’t be disappointed with a day in Napa Valley and our very popular Fall Color Weekend in the Wine Country.

Due to the success of our spring tour to Big Sur and Monterey, we are repeating it in September.

The winter months will find us out at night with our plethora of Night Photo Tours in San Francisco and along the coast. We are adding new locales all the time as SF is so photogenic at night.

We were fortunate to be in Venice for Carnival in February and will repeat it in 2010.

Please contact us for more information and to register for a tour: info@light-fantastic.com

"Great photography is about depth of feeling, not depth of field"...Peter Adams

Gale Perry, Light Fantastic Photo Tours
www.light-fantastic.com
100 Lucky Drive, Suite 207 Corte Madera, Ca. 94925 415 927-1639 Fax:415 927-0720

2009 TOURS
June 20 & 28 Lavender Tour
July 3 & 4 Fireworks
July 11, 18, 25 SF Camera Walk
August 1 SF Camera Walk
Aug 8 Flower Workshop
Aug. 13-16 San Francisco
Sept. 9-12 Big Sur/Monterey

October 9-16 Maine & Acadia Natl. Park
Oct. 17 SF Coast Series
Oct. 24 Napa Valley Fall
Oct.30-Nov 1 Ca. Fall Color Wine Country Weekend
November 1 Full Moon SF
November 7 SF Coast Series
Nov. 14 SF by Night
November 20 SF Holiday Lights w/Fireworks

Dec. 2 SF Full Moon
December 5 SF Holiday Lights
Dec. 12, 27 SF Coast Series
Dec. 19 SF Holiday Lights
Dec. 30 SF Full Moon

2010 Tours
Jan . 2 CA Tide Pools
Feb. 27 Napa Mustard
Feb. Carnival in Venice
March 3-7 Death Valley