Space is Still Available for my November Seminars.
www.jerryandmarcymonkman.com
Maximize Your Images.
Do you have a year's worth of digital photos sitting on your hard drive waiting for you to turn into to stunning images you are proud to hang on your wall? Are you feeling bogged down in gigabytes of photo files that you want to efficiently manage and process into easy-to-find, beautiful images? If you answered yes, then you may want to sign up for one or both of my upcoming digital seminars.
On Saturday, November 8th, I'll be teaching Basic Photoshop for the Outdoor Photographer, a class that will teach you all of the important Photoshop skills you need to maximize 95% of the images you shoot.On Sunday, November 9th, I'll be teaching Lightroom in a Day, which will bring you up to speed on the most powerful digital photography organizing, photo editing, and printing software out there.There is still plenty of room in both classes, so check out our website now for more info or to register.
Our Price: $95.00 per seminar, $170.00 for both.
Learn more about the seminars here.
Sunday, October 19, 2008


Saturday, October 18, 2008
NEW YORK CITY October 23-26, 2008
From: http://www.popphoto.com/mentor-series-upcoming-treks/5410/new-york-city-october-23-26-2008.html
Once in a Lifetime Photo Ops:
• Hop on board and experience New York from the harbor on a private boat tour, with majestic and up- close views of the Statue of Liberty, Battery Park, United Nations and the Manhattan and Williamsburg Bridges.
• Enjoy exclusive access to the famous “Top of the Rock”. Photograph the city from 70 stories in the sky during early morning light. View this spectacular city at a 360 degree panoramic view.
• Join us at the distinctive photo event of the year, Photo Plus Expo, the leading show for the photo industry. Enjoy this inspiring opportunity to discover the most up-to-date products and services.
• Capture New York City’s must-see avenues and hot spots in the evening light on a Double Decker bus specially arranged for our group.
Travel with our mentors and try out all of the latest equipment from Nikon! Including world class digital SLRs, Nikkor lenses and the Coolpix line of Digital Cameras.
Travel alongside Nikon professional photographers Mark Alberhasky and Steve Simon and capture a whirlwind of dazzling activity and fast-paced movement in New York City. This sleepless city plays host to an unending array of sights and sounds that will wow your lens like no place else.
Kick off your trek on a mid-morning, private boat cruise through the New York harbor where stunning views of the grand buildings and bridges, so much of the city’s history and character, will unfold before you. As the sun goes down, walk across the East River on the Brooklyn Bridge’s elevated walkway. This significant landmark is one of the oldest suspension bridges in the country. Marvel at its majestic gothic style arches and spectacular views, but don’t forget to point your camera back for a breathtaking perspective of the Manhattan skyline, or point it down to capture boats on the East River. Practice panning with the cars that zoom by underfoot. As night falls, make your way over to Times Square and fill your lens with images which are quintessential New York: lightning fast cabs, the glow of neon lights and hordes of hurried passersby.Go on a walking tour of the historic Central Park, the most visited city park in the US. This landmark covers 843 acres and offers a green haven from the urban bustle for both tourists and locals alike. Turn your lens on Strawberry Fields (the John Lennon Imagine memorial), the Bethesda fountain, a turn-of-the-century carousel or the Wollman Skating Rink—all of which have been featured in many movies and television shows for decades. This park will provide no shortage of natural areas beautifully landscaped, modern sculptures, local artists and street musicians—clearly countless unmatched photo opportunities for you to explore.
You can be sure that around every corner of this urban landscape awaits another unique photo opportunity; so don’t miss your chance to capture it all.
Once in a Lifetime Photo Ops:
• Hop on board and experience New York from the harbor on a private boat tour, with majestic and up- close views of the Statue of Liberty, Battery Park, United Nations and the Manhattan and Williamsburg Bridges.
• Enjoy exclusive access to the famous “Top of the Rock”. Photograph the city from 70 stories in the sky during early morning light. View this spectacular city at a 360 degree panoramic view.
• Join us at the distinctive photo event of the year, Photo Plus Expo, the leading show for the photo industry. Enjoy this inspiring opportunity to discover the most up-to-date products and services.
• Capture New York City’s must-see avenues and hot spots in the evening light on a Double Decker bus specially arranged for our group.
Travel with our mentors and try out all of the latest equipment from Nikon! Including world class digital SLRs, Nikkor lenses and the Coolpix line of Digital Cameras.
Travel alongside Nikon professional photographers Mark Alberhasky and Steve Simon and capture a whirlwind of dazzling activity and fast-paced movement in New York City. This sleepless city plays host to an unending array of sights and sounds that will wow your lens like no place else.
Kick off your trek on a mid-morning, private boat cruise through the New York harbor where stunning views of the grand buildings and bridges, so much of the city’s history and character, will unfold before you. As the sun goes down, walk across the East River on the Brooklyn Bridge’s elevated walkway. This significant landmark is one of the oldest suspension bridges in the country. Marvel at its majestic gothic style arches and spectacular views, but don’t forget to point your camera back for a breathtaking perspective of the Manhattan skyline, or point it down to capture boats on the East River. Practice panning with the cars that zoom by underfoot. As night falls, make your way over to Times Square and fill your lens with images which are quintessential New York: lightning fast cabs, the glow of neon lights and hordes of hurried passersby.Go on a walking tour of the historic Central Park, the most visited city park in the US. This landmark covers 843 acres and offers a green haven from the urban bustle for both tourists and locals alike. Turn your lens on Strawberry Fields (the John Lennon Imagine memorial), the Bethesda fountain, a turn-of-the-century carousel or the Wollman Skating Rink—all of which have been featured in many movies and television shows for decades. This park will provide no shortage of natural areas beautifully landscaped, modern sculptures, local artists and street musicians—clearly countless unmatched photo opportunities for you to explore.
You can be sure that around every corner of this urban landscape awaits another unique photo opportunity; so don’t miss your chance to capture it all.
Friday, October 17, 2008
PAINTING WITH SHUTTER SPEED Noooooooo Tripods Allowed!
To read the rest of this interesting article and to see example of his technique visit:
http://ppsop.blogspot.com/2008/09/painting-with-shutter-speed-noooooooo.html
PAINTING WITH SHUTTER SPEED
http://ppsop.blogspot.com/2008/09/painting-with-shutter-speed-noooooooo.html
PAINTING WITH SHUTTER SPEED
Noooooooo Tripods Allowed!
Bryan F PetersonFounder/PPSOP www.ppsop.net

Until recently, the 'rule' of photography has been to "keep the horizon line straight and above all else, make sure its in focus". It was also unthinkable for a photographer to deliberately handhold their camera at a very slow shutter speed without the aid of a tripod. For those who did venture out of this 'norm', they were often scoffed at because the resulting images were of course "blurry and out of focus" and on more than one occasion the photographer was asked "were you drunk when you took that shot?"
Fortunately times have changed and the idea of "painting with a slow shutter speed" has been embraced. But, unlike panning, which is already challenging enough, painting with a slow shutter speed is a real "hit or miss" affair, BUT when everything does come together, it is truly rewarding. (Have you priced 'abstract art" lately? Doing it yourself is not only 'cheaper', but since you 'painted' it yourself, its also that much more rewarding.
Painting with shutter speed is a simple technique really. The challenge is in finding the 'right' subject to paint. Once you feel you have found a subject to paint, you simply set a correct exposure that will allow you to use, a 1/4 or a 1/2 second shutter speed, and at the moment you press the shutter release, you twirl, arch, jiggle, or jerk the camera in and up and down, or side to side or round and round motion; PRESTO an instant abstract painting! Just as Monet discovered with his brush and canvas, flower gardens continue to be the number one choice of photographers for painting with shutter speed, but don't overlook other compositional patterns as well, such as boat harbors, fruit/vegetable markets and even the crowd in the stands at the NFL football match. Also, consider painting with shutter speed in low-light where shutter speeds can range from 2 to 8 seconds-the difference here is that your movements are slower then the quick and hurried 'jiggle' mentioned above, and the resulting effect can look like that of an artist who uses a palette knife as the exposure time builds up one layer upon another.
Not much is required to create some truly exciting abstract paintings with your camera other then a slow shutter speed and the willingness to perhaps look 'foolish' in the presence of others. Defying all the 'laws' of photography, strangers stop momentarily as they find it odd to see you with your camera pointed at a given subject, jiggling, spinning, jerking and/or turning your camera while pressing the shutter release, and they cant for the life of themselves understand what on earth you could possibly be so happy about it. You may even perhaps give the impression that you suffer from a nerve disorder which would no doubt accounts for why you cant obviously hold the camera steady. Like I said, we do look foolish, but do we really care?
To read the rest of this interesting article and to see example of his technique visit:
http://ppsop.blogspot.com/2008/09/painting-with-shutter-speed-noooooooo.html
Fortunately times have changed and the idea of "painting with a slow shutter speed" has been embraced. But, unlike panning, which is already challenging enough, painting with a slow shutter speed is a real "hit or miss" affair, BUT when everything does come together, it is truly rewarding. (Have you priced 'abstract art" lately? Doing it yourself is not only 'cheaper', but since you 'painted' it yourself, its also that much more rewarding.
Painting with shutter speed is a simple technique really. The challenge is in finding the 'right' subject to paint. Once you feel you have found a subject to paint, you simply set a correct exposure that will allow you to use, a 1/4 or a 1/2 second shutter speed, and at the moment you press the shutter release, you twirl, arch, jiggle, or jerk the camera in and up and down, or side to side or round and round motion; PRESTO an instant abstract painting! Just as Monet discovered with his brush and canvas, flower gardens continue to be the number one choice of photographers for painting with shutter speed, but don't overlook other compositional patterns as well, such as boat harbors, fruit/vegetable markets and even the crowd in the stands at the NFL football match. Also, consider painting with shutter speed in low-light where shutter speeds can range from 2 to 8 seconds-the difference here is that your movements are slower then the quick and hurried 'jiggle' mentioned above, and the resulting effect can look like that of an artist who uses a palette knife as the exposure time builds up one layer upon another.
Not much is required to create some truly exciting abstract paintings with your camera other then a slow shutter speed and the willingness to perhaps look 'foolish' in the presence of others. Defying all the 'laws' of photography, strangers stop momentarily as they find it odd to see you with your camera pointed at a given subject, jiggling, spinning, jerking and/or turning your camera while pressing the shutter release, and they cant for the life of themselves understand what on earth you could possibly be so happy about it. You may even perhaps give the impression that you suffer from a nerve disorder which would no doubt accounts for why you cant obviously hold the camera steady. Like I said, we do look foolish, but do we really care?
To read the rest of this interesting article and to see example of his technique visit:
http://ppsop.blogspot.com/2008/09/painting-with-shutter-speed-noooooooo.html
Thursday, October 16, 2008
Non-photographers Say the Darndest Things
I am sure that we all have had experiences like this.
http://www.naturephotographers.net/articles0908/kl0908-1.html
Non-photographers Say the Darndest Things
Text and photography copyright © Kerry Leibowitz. All rights reserved.
" At various points when photographing in the field I'm sure we've all run into our share of characters. I know I have. In fact, I think I've run into more than my share. Some of these folks have been photographers themselves, but for some reason, the most memorable encounters I've had in the field have been with non-photographers. I always try to be pleasant and I'm usually happy to engage these folks, as long as I'm not deeply involved with the subject matter. Sometimes, however, this isn't as easy as it seems. I've compiled a diary of my favorite in-field experiences. Here they are in no particular order."
http://www.naturephotographers.net/articles0908/kl0908-1.html
http://www.naturephotographers.net/articles0908/kl0908-1.html
Non-photographers Say the Darndest Things
Text and photography copyright © Kerry Leibowitz. All rights reserved.
" At various points when photographing in the field I'm sure we've all run into our share of characters. I know I have. In fact, I think I've run into more than my share. Some of these folks have been photographers themselves, but for some reason, the most memorable encounters I've had in the field have been with non-photographers. I always try to be pleasant and I'm usually happy to engage these folks, as long as I'm not deeply involved with the subject matter. Sometimes, however, this isn't as easy as it seems. I've compiled a diary of my favorite in-field experiences. Here they are in no particular order."
http://www.naturephotographers.net/articles0908/kl0908-1.html
Wednesday, October 15, 2008
The Hummingbird Guide
The Hummingbird Guide – How to Photograph Hummingbirds Using High-Speed Multiple Flash by LINDA ROBBINS with Arthur Morris
Linda Robbins began work on this guide in late 2007 and promised that it would be finished by February 1, 2008… As you might guess, it turned out to be a lot more work than Linda envisioned. We now have the first 100 CDs burned and ready to ship, and believe me, the guide was well worth waiting for.
There is a smattering of information available on line and in various books and publications, but never before has everything that you need to know to get started in this highly specialized field of photography been assembled in one place in a pleasingly designed, easy-to-read format. The guide is comprehensive in its scope; among the topics covered are choosing cameras and lenses, suitable tripods and tripod heads, choosing and purchasing suitable flashes, the needed equipment (flash stands, articulated arms, mini ball heads, etc.), choosing and setting up your feeder(s), how to create your artificial backgrounds, detailed, step-by-step instructions on setting up including flash and background placement, determining the right exposure, an explanation of the flash theory involved in high speed flash hummingbird photography, helpful odds and ends, digital and Photoshop considerations, the best rechargeable batteries and battery chargers, dealing with ants, bees and wasps at the set-up, dealing with the guarding birds that keep all others away from the set-up, the best photographic strategies including focus-acquisition tips, introducing perches to the set-up, and selecting flowers and adding them to the set-up. In addition, Linda writes eloquently on the topic of becoming addicted to high speed flash hummingbird photography (consider yourself fore-warned). Also included is an informative section entitled “About Hummingbirds.” Photographing perched hummers, creating pleasingly blurred images, and using macro lenses for hummingbird head-portraits are dealt with in photo-illustrated gallery format.
The section on needed equipment is especially impressive as Linda does a thorough job of exploring the variously priced options and lets you know exactly what she is using at present. The book is lavishly illustrated with both of our images (most of them, and all of the very best, are Linda’s.)
In truth, I cannot say enough in praise of this great new work. Linda is a skilled photographer and her hummingbird images are among the best you will see anywhere. And Linda is a skilled writer. I enjoyed both editing her words and authoring a section or two for the guide. Your purchase will include periodic free updates via e-mail PDF files.
You can order your copy of “The Hummingbird Guide – How to Photograph Hummingbirds Using High-Speed Multiple Flash” (on CD only) today for $50 plus $3 shipping and handling ($53 total) in the US. Florida residents need to add 7% sales tax: $53.50 plus the $3 shipping and handling ($56.50 total). To Canada the cost is $50 plus $6 shipping ($56 total). For overseas customers the cost will be $50 plus $8 shipping and handling ($58 total). A check made out to “Arthur Morris” and sent to us at BIRDS AS ART, PO Box 7245, Indian Lake Estates, FL 33855 is fine. As is a Paypal payment. Or, call us at 863-692-0906 with credit card in hand.
Whether you are just thinking about getting started in this field or have been doing it for years, there is tons for you to learn from Linda’s great new guide. We are proud to add it to the BIRDS AS ART information-in-digital-form line-up. Even better news for folks who can never envision spending big bucks on a flash set-up and traveling overseas with all that gear: Linda will be leading several high speed flash hummer trips to various South and Central American hotspots. All you need to do is bring a camera, lens, tripod, and tripod head and show up. Linda will have everything else that you need. Two photographers per set-up. For info write Linda at lindaasart@aol.com
Lastly, BAA Mail Order will be carrying most of the specialty items that you need to get started; details to follow.
Linda Robbins began work on this guide in late 2007 and promised that it would be finished by February 1, 2008… As you might guess, it turned out to be a lot more work than Linda envisioned. We now have the first 100 CDs burned and ready to ship, and believe me, the guide was well worth waiting for.
There is a smattering of information available on line and in various books and publications, but never before has everything that you need to know to get started in this highly specialized field of photography been assembled in one place in a pleasingly designed, easy-to-read format. The guide is comprehensive in its scope; among the topics covered are choosing cameras and lenses, suitable tripods and tripod heads, choosing and purchasing suitable flashes, the needed equipment (flash stands, articulated arms, mini ball heads, etc.), choosing and setting up your feeder(s), how to create your artificial backgrounds, detailed, step-by-step instructions on setting up including flash and background placement, determining the right exposure, an explanation of the flash theory involved in high speed flash hummingbird photography, helpful odds and ends, digital and Photoshop considerations, the best rechargeable batteries and battery chargers, dealing with ants, bees and wasps at the set-up, dealing with the guarding birds that keep all others away from the set-up, the best photographic strategies including focus-acquisition tips, introducing perches to the set-up, and selecting flowers and adding them to the set-up. In addition, Linda writes eloquently on the topic of becoming addicted to high speed flash hummingbird photography (consider yourself fore-warned). Also included is an informative section entitled “About Hummingbirds.” Photographing perched hummers, creating pleasingly blurred images, and using macro lenses for hummingbird head-portraits are dealt with in photo-illustrated gallery format.
The section on needed equipment is especially impressive as Linda does a thorough job of exploring the variously priced options and lets you know exactly what she is using at present. The book is lavishly illustrated with both of our images (most of them, and all of the very best, are Linda’s.)
In truth, I cannot say enough in praise of this great new work. Linda is a skilled photographer and her hummingbird images are among the best you will see anywhere. And Linda is a skilled writer. I enjoyed both editing her words and authoring a section or two for the guide. Your purchase will include periodic free updates via e-mail PDF files.
You can order your copy of “The Hummingbird Guide – How to Photograph Hummingbirds Using High-Speed Multiple Flash” (on CD only) today for $50 plus $3 shipping and handling ($53 total) in the US. Florida residents need to add 7% sales tax: $53.50 plus the $3 shipping and handling ($56.50 total). To Canada the cost is $50 plus $6 shipping ($56 total). For overseas customers the cost will be $50 plus $8 shipping and handling ($58 total). A check made out to “Arthur Morris” and sent to us at BIRDS AS ART, PO Box 7245, Indian Lake Estates, FL 33855 is fine. As is a Paypal payment. Or, call us at 863-692-0906 with credit card in hand.
Whether you are just thinking about getting started in this field or have been doing it for years, there is tons for you to learn from Linda’s great new guide. We are proud to add it to the BIRDS AS ART information-in-digital-form line-up. Even better news for folks who can never envision spending big bucks on a flash set-up and traveling overseas with all that gear: Linda will be leading several high speed flash hummer trips to various South and Central American hotspots. All you need to do is bring a camera, lens, tripod, and tripod head and show up. Linda will have everything else that you need. Two photographers per set-up. For info write Linda at lindaasart@aol.com
Lastly, BAA Mail Order will be carrying most of the specialty items that you need to get started; details to follow.
Upcoming Photo Events
Hi Lisa, I consolidated some upcoming photo seminars and photo ops into one list. Rick
Upcoming Photo Events
Sat 10/18/08 Klingberg Antique Auto ShowKlingberg Family Centers Campus, New Britain, CT$5www.klingbergautoshow.org
Sat–Sun 10/18 – 10/19/08 CAP NJ Lighthouse Trip13 NJ lighthouses are open for visitation & climbing (open to the public); free souvenirshttp://capinct.org/Documents/Lighthouse%20Trip%20Oct%2008-1.pdfhttp://www.njlhs.org/challenge/challenge.html
Thu-Sat 10/23 – 10/25/08
PhotoPlus Expo
Jacob Javits Center, New York City
http://www.photoplusexpo.com/ppe/index.jsp
Mon 11/10/08 Boston, MA
Tue 11/11/08 Queens, NY
Thu 11/13/08 Saddlebrook, NJ
An Evening With Jack Davis
The author of the Photoshop ‘WOW’ books will present a 3-hour seminar on Photoshop CS4 and Lightroom 2 $39
http://www.software-cinema.com/page/wowsc
Sat 11/15/08
CAP All-Day Seminar
Adam Jones & Onne van der Wal
Holiday Inn, North Haven, CT$25 in advance
http://capinct.org/Documents/CAP%20Seminar%2011-15-08-students.pdf
Sat 11/22/08
Yankee Photographic Society All-Day Seminar
George Lepp
Danvers High School, Danvers, MA$25 in advance + optional $6 buffet lunchhttp://www.neccc.org/New_Outline_14.htm
Sat-Sun 3/14 – 3/15/09
Rocky Mountain School of Photography 2-Day Seminar
Mass Mutual Center, Springfield, MA$159 for both days ($119 for one day) – NECCC Club Members use Discount Code GC117
Save $20 per person with group of 5 or more5 tracks offering 3 different programs each track for a total of 15 different courses (of which you can attend 5) A 6th track offers a personal critiqueIndustry representatives will be on hand
https://www.rmsp.com/weekends/Courses.aspx
Register online at www.rmsp.com/weekends or call 800-394-7677 to register by phone. You may also download registration forms from www.rmsp.com/weekends.
Upcoming Photo Events
Sat 10/18/08 Klingberg Antique Auto ShowKlingberg Family Centers Campus, New Britain, CT$5www.klingbergautoshow.org
Sat–Sun 10/18 – 10/19/08 CAP NJ Lighthouse Trip13 NJ lighthouses are open for visitation & climbing (open to the public); free souvenirshttp://capinct.org/Documents/Lighthouse%20Trip%20Oct%2008-1.pdfhttp://www.njlhs.org/challenge/challenge.html
Thu-Sat 10/23 – 10/25/08
PhotoPlus Expo
Jacob Javits Center, New York City
http://www.photoplusexpo.com/ppe/index.jsp
Mon 11/10/08 Boston, MA
Tue 11/11/08 Queens, NY
Thu 11/13/08 Saddlebrook, NJ
An Evening With Jack Davis
The author of the Photoshop ‘WOW’ books will present a 3-hour seminar on Photoshop CS4 and Lightroom 2 $39
http://www.software-cinema.com/page/wowsc
Sat 11/15/08
CAP All-Day Seminar
Adam Jones & Onne van der Wal
Holiday Inn, North Haven, CT$25 in advance
http://capinct.org/Documents/CAP%20Seminar%2011-15-08-students.pdf
Sat 11/22/08
Yankee Photographic Society All-Day Seminar
George Lepp
Danvers High School, Danvers, MA$25 in advance + optional $6 buffet lunchhttp://www.neccc.org/New_Outline_14.htm
Sat-Sun 3/14 – 3/15/09
Rocky Mountain School of Photography 2-Day Seminar
Mass Mutual Center, Springfield, MA$159 for both days ($119 for one day) – NECCC Club Members use Discount Code GC117
Save $20 per person with group of 5 or more5 tracks offering 3 different programs each track for a total of 15 different courses (of which you can attend 5) A 6th track offers a personal critiqueIndustry representatives will be on hand
https://www.rmsp.com/weekends/Courses.aspx
Register online at www.rmsp.com/weekends or call 800-394-7677 to register by phone. You may also download registration forms from www.rmsp.com/weekends.
Tuesday, October 14, 2008
RMSP Weekend event in Springfield
In the attached letter you will find details regarding the RMSP Weekend event in Springfield, Massachusetts on March 14-15, 2009 and the group savings code for New Haven Camera Club. Please pass the information on to your club members. Thank you.
Bob
Bob McGowan
Programs Specialist
Rocky Mountain School of Photography
210 N. Higgins Avenue, Suite 101
Missoula, MT 59802
(800) 394-7677 x107
Rocky Mountain School of Photography (RMSP) is bringing one of its Weekend events to Springfield, Massachusetts on March 14-15, 2009. Each year RMSP travels around the country teaching our unique brand of photography education. RMSP Weekends are two fun-filled days, loaded with information about the latest tools and techniques in photography. Following are some important details for the Springfield Weekend.
Location: MassMutual Center
1277 Main Street • Springfield, MA 01103
What: Fifteen classes to choose from, a professional critique session, industry representatives and great door prizes. Visit www.rmsp.com/weekends for a schedule of classes and a list of course descriptions.
Who Attends: Class content is suitable for digital or film shooters, beginner through intermediate amateur photographers.
Group Pricing: $159 per person for both days, $119 for one day. Online and early
registration savings have been included in your group pricing (a savings of
$20 for two days and $10 for one day).
Your group code is: GC126 Submit this code when registering to receive the special group price mentioned above.
Registration: Register online at www.rmsp.com/weekends or call (800) 394-7677 to register by phone. You may also download registration forms from www.rmsp.com/weekends and mail in your registration if you would like.
Please keep in mind that in 2008 most of our Weekend events sold out ahead of time. We encourage you to register early. In order to secure a spot, registrations must be received in our office before an event has sold out. You can register now using any of the methods mentioned above.
Please do not hesitate to call if you have questions regarding the RMSP Weekend event in Springfield.
Hope to see soon!
Michelle Lousen
Weekends Director
Rocky Mountain School of Photography
210 N. Higgins Ave., Suite 101 • Missoula, MT 59802
(800) 394-7677
weekends@rmsp.com
Bob
Bob McGowan
Programs Specialist
Rocky Mountain School of Photography
210 N. Higgins Avenue, Suite 101
Missoula, MT 59802
(800) 394-7677 x107
Rocky Mountain School of Photography (RMSP) is bringing one of its Weekend events to Springfield, Massachusetts on March 14-15, 2009. Each year RMSP travels around the country teaching our unique brand of photography education. RMSP Weekends are two fun-filled days, loaded with information about the latest tools and techniques in photography. Following are some important details for the Springfield Weekend.
Location: MassMutual Center
1277 Main Street • Springfield, MA 01103
What: Fifteen classes to choose from, a professional critique session, industry representatives and great door prizes. Visit www.rmsp.com/weekends for a schedule of classes and a list of course descriptions.
Who Attends: Class content is suitable for digital or film shooters, beginner through intermediate amateur photographers.
Group Pricing: $159 per person for both days, $119 for one day. Online and early
registration savings have been included in your group pricing (a savings of
$20 for two days and $10 for one day).
Your group code is: GC126 Submit this code when registering to receive the special group price mentioned above.
Registration: Register online at www.rmsp.com/weekends or call (800) 394-7677 to register by phone. You may also download registration forms from www.rmsp.com/weekends and mail in your registration if you would like.
Please keep in mind that in 2008 most of our Weekend events sold out ahead of time. We encourage you to register early. In order to secure a spot, registrations must be received in our office before an event has sold out. You can register now using any of the methods mentioned above.
Please do not hesitate to call if you have questions regarding the RMSP Weekend event in Springfield.
Hope to see soon!
Michelle Lousen
Weekends Director
Rocky Mountain School of Photography
210 N. Higgins Ave., Suite 101 • Missoula, MT 59802
(800) 394-7677
weekends@rmsp.com
Is there a preference in saving the file in TIFF vs. PSD
Digital Darkroom Questions (DDQ) October 9, 2008
by Tim Grey http://www.timgrey.com/ Books: www.timgrey.com/books/index.htm Blog: www.timgrey.com/blog
##########
After editing a file in Photoshop CS3, is there a preference in saving the file in TIFF vs. PSD?
==========
Not really. You can actually use either format interchangeably in terms of the features supported for your images. That includes multiple layers, alpha channels, layer masks, smart objects, and more. You won't lose anything in your images by choosing one format over the other.
Because of the compression options available in the TIFF file format you can achieve smaller file sizes (I recommend using the LZW compression option in the TIFF Options dialog box that is displayed when you save a file as a TIFF). That's really about the only difference from a practical perspective.
Having said that, I still use the Photoshop PSD file format for saving all of my master image files. The reason is mostly historical, but it still provides a benefit to me in terms of basic file organization. Because Photoshop didn't used to allow you to save layered TIFF files, if you worked with layers (which I've always strongly recommended) you needed to save the resulting image file as a PSD. As a result, when you looked at a list of files on your hard drive, you would know the PSD file was the layered "master" file, and any TIFF images were derivative files created for specific output.
Based on that history, I use PSD for the master image file with all layers intact, and TIFF for the flattened version of the image I'll produce when including images in my books, newsletter, magazines, or other output.
That's my reasoning, but it is admittedly only a minor advantage. If reducing file sizes is more important to you I'd suggest using the TIFF file format with LZW compression applied.
##########
Support the DDQ E-mail Service
Contributions from readers like you are the only compensation for the time and effort that goes into producing this email service. You can help support this effort by becoming a contributor. Besides helping to ensure this service remains viable, you'll gain access to a searchable archive of all prior questions and have the opportunity to have your own questions considered for inclusion in the DDQ email. Details can be found here:www.timgrey.com/ddq/
The Fine Print: Please feel free to forward this e-mail message to any friends that may be interested, and recommend that they subscribe to the free service. All I ask is that you forward the message in its entirety.
Details on adding or removing an e-mail address can be found here:www.timgrey.com/ddq/
Contents of this e-mail are copyright by Tim Grey. All Rights Reserved.
Monday, October 13, 2008
The Smartest Camera Strap Ever
The Smartest Camera Strap Ever
~Have a cool photo product or site? Reach 220,000 photo fans
We’ve been hearing a lot about the R-Strap lately, but we thought, “Really? It’s just a camera strap. What’s the big deal?”
Turns out it’s a really smart design. The strap hangs diagonally across your chest like a messenger bag, so:
It’s more comfortable than a neck strap, and…
Your camera stays out of the way at your hip.
The smart bit is the little slider attachment that allows you to glide the camera up the strap to your eye so you can take a picture. The camera moves, but the strap doesn’t. See it in action here.
It’s really clever, and we’re kind of kicking ourselves for not thinking of it first.
Added bonus! For all of our thrifty brethren out there, we’re including a couple of ways to make one yourself. Either way, your neck will thank you.
The Original R-Strap ($44)
Make Your Own R-Strap (Version 1)
Make Your Own R-Strap (Version 2)
~Have a cool photo product or site? Reach 220,000 photo fans
We’ve been hearing a lot about the R-Strap lately, but we thought, “Really? It’s just a camera strap. What’s the big deal?”
Turns out it’s a really smart design. The strap hangs diagonally across your chest like a messenger bag, so:
It’s more comfortable than a neck strap, and…
Your camera stays out of the way at your hip.
The smart bit is the little slider attachment that allows you to glide the camera up the strap to your eye so you can take a picture. The camera moves, but the strap doesn’t. See it in action here.
It’s really clever, and we’re kind of kicking ourselves for not thinking of it first.
Added bonus! For all of our thrifty brethren out there, we’re including a couple of ways to make one yourself. Either way, your neck will thank you.
The Original R-Strap ($44)
Make Your Own R-Strap (Version 1)
Make Your Own R-Strap (Version 2)
Going to the 2008 PhotoPlus Expo ??
Going to the 2008 PhotoPlus Expo
Why not go with fellow photographers? Email or call Wayne if you are interested.
Could you blog possibly advertise groups or individuals who are planning to go to the 2008 PhotoPlus Expo and won't mind others joining. I can share gas and parking expenses but won't drive in myself since I am not familiar with roads down there. I could also go with someone by train who is more familiar with the New York transit system.
Wayne Nolting - iMix Studio w.nolting@cox.net
Interactive, Flash, & Streaming Audio Visual Designer/Producer
Newington, CT
860-930-6113
Producer@iMixStudio.com
Antique Auto Show
Thank you Howard for passing this along!
http://www.klingbergautoshow.org/
Klingberg Antique Auto Show, Saturday, October 18th, 2008Show Time: 10 AM to 4 PM on the Klingberg Campus
In addition to viewing hundreds of antique vehicles, you can spend an entire day strolling around the beautiful grounds enjoying an array of fun activities. The children will especially appreciate the clowns, stilt-walkers and other entertainers, face painting and balloons–all included in the $5 price of admission. Throughout the day, dancers will delight you with a selection of tangos, trots, waltzes and mazurkas done with great panache, and in period costumes.
Driving Directions
From Major Interstates
via Route I-91
Route I-91 North from New Haven Or South From Hartford
Leave Route 91 at Exit 22N (New Britain)--Follow Route 9N
Leave Route 9N at Exit 24 for Routes 71 and 372 (Kensington)--This is a left hand exit
Follow 372 to the first set of lights
Turn right onto Route 71A (High Road/Kensington Avenue)
Take the second left, Cambridge Street
At the end of Cambridge Street, take a left onto Linwood Street
Klingberg Family Centers is at the top of the hill
I-84 (East & West) to Exit 35 (Rt. 72 East)
Take first exit: Corbin Ave, turn right and follow signs
Rt 9 North to Exit 24 (left hand exit) Rt 372
Spectators take first exit
At light, continue straight into Rock Cats Stadium parking
Antuque Car Owners contiue to the end of Rt 372 & follow signs.
Rt 9 South to Rt 72 West
Take first exit: Corbin Ave, turn left and follow signs
Sunday, October 12, 2008
Days are shorter, make your longer exposure count
DUSK and LOW LIGHT
1 SECOND AND BEYOND
LOW LIGHT AND NIGHT PHOTOGRAPHY
Make your longer exposure count, now that your days are shorter...
An excellent article by Bryan F Peterson/Founder of The Perfect Picture School of Photography http://www.ppsop.net/
It seems to be this unwritten rule that before the sun comes up or after the sun goes down that its really not possible for most shooters to get any good pictures. These same two reasons I hear today are the same two reasons I heard years ago; "there is not enough 'light', and/or "you need one of the more expensive cameras don't you?" or "I don't know how to get a meter reading." But clearly as the following images show there is ALWAYS enough light and getting a meter reading could'nt be easier as I will show you. Truth be told, I am convinced that the real reason most shoters dont venture out at night to shoot is because shooting at these hours of the day CAN interefere with one's lifestyle. (Just ask my wife and kids!)
Low light and night photography do pose special challenges, not the least of which is to use a tripod, (assuming of course you want to record exacting sharpness) and some degree of mathematical skills (simple adddition or subtraction) in some cases to come up with a correct exposure, but again, it is my feeling that the greatest hindrance in shooting the low light of predawn or at night is in the area of self-discipline. "It's time for dinner". (Next time pack a sandwich.) It's time to go to a movie." (Save your money and buy the movie when it comes out on DVD.) "It's time to go to a party." (Showing up an hour or two later, when everyone else has had a few glasses; now that's fun!") "I'm not a morning person." (Then don't go to bed the night before.) "It's time to watch my favorite television show". (You can tape it or use TIVO and see it after you're done shooting.) "My friends are waiting for me back at the car." (Make photographers your friends and they will gladly join you on the shoot.) "I'm all alone and don't feel safe." (Again, make photogrpahers your friends or join a camera club.) "I don't have a tripod." (Buy one!)
In my on-location workshops and in my on-line courses, students quickly learn just how much photographic opportunity exists before the sun comes up and after the sun goes down. And the rewards far outweigh the sacrifices. If it is one's goal to record compelling imagery, and it should be, then low light and night photography are two areas where compelling imagery abounds. With a little planning and a little forethought, you can soon find yourself in countless locations to shoot some show stopping exposures. Once you've arrived at a given location and conclude that this is where you will set up the only question remains is how to set the exposure for the upcoming 'light show'.With the sophistication of today's cameras and their highly sensitive light meters, getting a correct exposure is common place, even in the dimmest of light.
Yet this is an area where many photographers often find themselves under a cloud of confusion. "Where should I take my meter reading from? How long should my exposure be? Should I use any filters?"
In my years of experience in taking meter readings, there is nothing better nor more consistent then when taking a meter reading off of the sky; whether I am shooting backlight, frontlight or sidelight, whether I am shooting the first light of dawn or the last remnants of light at dusk.What should my exposure be when shooting in low light or at night? Now that's a really good question, but by now, you should know the answer or feel a lot closer to being able to answer it. Your exposure will be based on the very same principles of a creative exposure discussed already throughout this book. Does the scene present any motion-filled opportunities or are we simply shooting a classic skyline of some city, large or small? Either way, the principles of metering are the same in so far as where to take a meter reading from, BUT if there is motion involved, such as the flow of traffic, then you do have the option of setting an exposure that will render that flow of traffic as fluid streaks of color. For example, if one wishes to shoot a simple exposure, (and I really do mean simple) in manual exposure mode of a city skyline, set your aperture to f/8 and raise the camera to the dusky sky above the cityscape or landscape and adjust your shutter speed until a correct exposure is indicated and then return to your composition and press the shutter release. (It's important to note that its entirely possible that once you return to your composition, after you have set the manual exposure, that your meter may now indicate an underexposure, but just ignore it and shoot. The underexposure indicated is in response to what the meter 'see's' as dark buildings but in this case the meter has been fooled as the buildings really are not all that dark.)
For those of you who prefer to shoot scenes like this is in some kind of 'atuo-mode', e.g. Aperture Priority Mode, ditto on the use of f/8 and while pointing your camera to the dusky sky, hold your "exposure lock button" and then recompose and shoot. The exposure lock will 'save' the exposure for the dusky sky so when you shoot, it will be at the dusky exposure. Chances are in either case, and with 100 ISO, f/8 will render an exposure time of about two or four seconds. IF you are in fact shooting a motion-filled scene, than set your aperture to at least f/11 if not f/16, which in turn will increase your expsoure time from 2-4 seconds to 8-16 seconds. The longer the exposure time, the greater the amount of motion will be recorded.
PHOTO#1-#2-
What better place to try your hand at 'nightime' exposures then the greatest city on earth, New York! And a simple exposure too! With my camera and 17-55mm lens on tripod and with my ISO at 100, and my aperture set to f/8, I raised the camera to the dusky, partially cloudy sky above and adjusted my shutter speed until two seconds indicated a correct exposure. I then recomposed the scene and fired the shutter release and just like that, I had my dusky nightime exposure of the Big Apple. Because this scene did not present any real motion-filled opportunities, I did not find it necessary to increase my exposure time longer then two seconds. I have often 'caught' my students shooting an exposure like this with apertures of f/22 and exposure times of 15 seconds and when pressed as to the logic behind such a long exposure, they are hard pressed to give an answer since the 'same' exposure can be achieved at larger apertures (f/8) and shorter shuttter speeds (two seconds) in the absence of any motion-filled opportunities.Something to keep in mind, especially if you find yourself out shooting dusky scenes such as this with temperatures below freezing.
PHOTO#3-#4-#5-Part of the history in Lyon, France includes the work done by the Lumiere Brothers, both of whom are responsible for the birth of film. Not only could their invention, the Cinematograph, make a movie, but it could also project that same movie as well. Their first of more than 1400 films was shown in Paris in 1895 which showed a train pulling into a staiton and to some in the audience, this experience proved so frightneing that some went running for cover certain the train would come crashing into them.
For some years now, the City of Lyon has been holding a Lumiere Festival every Decemeber, partly in honor of the Lumiere Brothers and one main staple of the festival is the arrival from Germany of the largest Ferris Wheel on the European Continent. Situated at Place Bellcour for more than a month it does offer up numerous motion-filled opportunities, including the opportunity to incorporate this lone rider and horse statue against the background motion-filled ferris wheel.With my tripod mounted camera and 70-200mm lens set to f/11 and with my ISO at 100 I simply adjusted my shutter speed until four seconds indicated a correct exposure off of the dusky blue to the left of the ferris wheel. In effect, I metered this scene off of the dusky blue sky just like I did in the example shown of the New York City skyline.
I was now ready to shoot, BUT it certainly would'nt make any sense to shoot a four second exposure IF the ride was not moving, so I waited a few minutes for the ride to fill up with riders and soon it was making revolution after revolution and it was during this time I made a number of exposures, one of which you see here. And sure enough, I found myself taking a vertical composition as well, also at the correct exposure of f/11 at four seconds.
PHOTO#6-#7-San Francisco, Califronia, a city that many would swear is the ONLY city worth bragging about, but for me, it will always be a city that I could never quite get my head around. Don't get me wrong. I find San Francisco a shooters paradise, but try as I might, including live there, I could never embrace it as a city that I could call home. I am sure it will be one of those cities where even if I were to live there again, I would still feel that I was only visitor. From atop the steep incline on Treasure Island, a truly magnificient view of the city awaits. With my tripod mounted camera set to 100 ISO and 70-200mm lens, I chose an aperture of f/11 and with my camera pointed into the dusky blue sky to the right of the bridge, I adjusted my shutter speed until a corrrect exposure was indicated at four seconds. I returned the compositon you see here and fired away. At this slow shutter speed of four seconds I was able to record the slow but steady flow of traffic heading into the City by the Bay.
Of the many discoveries my students make in my on-location workshops it is the realization that many of their wonderful compositions that they create do in fact have additional photographic opportunities inside that frame. As idyllic this scene of San Francisco is, there is still yet at least one other dynamic image to be made, an image that is for the most part, resigned to strong graphic elements, primarily LINE and COLOR.
After switching my 70-200mm for my 200mm-400mm, I simply set the aperture to f/11 and for those same four seconds, compsed this vertical composition of just the bridge.Take a closer look on your next outing inside that viewfinder of yours and see if in fact you have another photographic opportunity to shoot. You might discover that you have been picking up your tripod and moving on to the next great shot a bit too premature.
PHOTO#8-For some men, (and women too I am sure) a scene like this speaks to the desire to simply get away from it all, out there in the wilderness for some long overdue solitude. No cell phones, no e-mails to check and no deadlines; just you and the sound of crickets and a crackling fire. With my tripod mounted camera set to 100 ISO and my 35-70mm lens I set my aperture to f/11 and pointed it to the pre-dawn sky above the camping spot and adjusted my shutter speed until a two second exposure indicated a correct exposure. Just like city lights, that campfire and the small Coleman lantern that is illuminating the inside of the ten, share a similar exposure value. Therefore, what that dusky sky indicates as a correct expsoure will be just as correct for the campfire and lighted tent and sure enough as this photograph shows, the overall exposure is spot on.
I feel the need to really stress what is meant by a dusky blue, sometimes magenta sky.It is a Western sky that is metered and photographed around 20-25 minutes after sunset or 15-20 minutes before sunrise and it is an Eastern sky that is metered and photographed around 15-20 minutes after sunset or 20-25 minutes before sunrise.
Saturday, October 11, 2008
7 Bad Habits of Digital Photographers
From: http://blog.epicedits.com/2007/12/27/7-bad-habits-of-digital-photographers/
7 Bad Habits of Digital Photographers
By Antoine Khater
Want more great projects, amazing photos, Photoshop tips, and articles on photography? Subscribe to Epic Edits today so you don’t miss a thing.
I have been taking pictures seriously for about 5 years and been around major photography forums for about the same time. Here are, compiled in one post, the 7 bad habits of digital photographers…
1. NOT DOUBLE CHECKING YOUR GEAR BAG
Photo by John Harvey [CC by-nc-sa]
It never happened to you? It sure did to me! I can’t remember how many times I went shooting just to notice later on that I forgot the CF cards at home. Just a few months ago my wife and I took a photography trip to Croatia and I totally forgot to pack the battery charger with me! So if you are as clumsy as I am, maybe you should trust your wife in packing things up for you.
2. NOT DOUBLE CHECKING ISO SETTINGS
Photo by Tom Hensel[CC by-nc-nd]
This is surely one of the most common post subjects you will find if you linger long enough in Digital Photography forums. We are all somehow used to reaching for our ISO settings button just when we need to go “higher” and we too often take it for granted that the camera is set to the “correct” one every time we take it from the bag. And that is why so many people are asking for the ISO setting to be displayed in the viewfinder, until then and to avoid surprises, good or bad, make sure to double check that ISO setting every time you turn your camera on.
3. I’LL GET THIS STRAIGHT LATER
Photo by Grant Lindsay [CC by-nd]
Let me first say that I have nothing against Photoshop or any other kind of photo retouching I even pointed out some times ago an easy way to correct tilted pictures in the digital dark room. However I believe that if you can get it right on the field it is better. So if you have the bad habit of tilting your pictures, here are 6 tips that will hep you get them straight next time.
4. I SHOOT RAW, I DON’T CARE ABOUT EXPOSURE
Photo by Rich G. [CC by-nc-sa]
RAW is wonderful tool and gives us, photographers, a great deal of flexibility during post processing. The ability to tweak the exposure in RAW should be used ONLY within limits — blown highlights and and underexposed shadows can’t be recovered. So make sure to always get the exposure right.
5. DELETING PICTURES TOO FAST
Photo by Vitor Sá [CC by-nc]
Well I’m writing this specially for myself! I delete pictures faster than I take them sometimes… Here is a recent article from LightChasers explaining why we should never be doing this.
6. BETTER BODY INSTEAD OF BETTER LENS
Photo by BryanFenstermacher [CC by-nc]
I guess it is just a human nature but every time a new camera is released we have all tendency to become green with envy and deep down we should know that we would be much better investing in a better lens than in a better camera.
7. BLAMING THE MATERIAL
Photo by Sergio Bertolini [CC by-nc-sa]
And, of course, on the TOP of the list “Blaming the material”! When we do not manage of getting a decent picture we go like “AH if only I had that lens!” but if someone looks at a nice pictures of ours and says “Wow you should have a nice camera!!!” We go crazy… Anyway, remember folks, it is always the photographer never the Camera.
7 Bad Habits of Digital Photographers
By Antoine Khater
Want more great projects, amazing photos, Photoshop tips, and articles on photography? Subscribe to Epic Edits today so you don’t miss a thing.
I have been taking pictures seriously for about 5 years and been around major photography forums for about the same time. Here are, compiled in one post, the 7 bad habits of digital photographers…
1. NOT DOUBLE CHECKING YOUR GEAR BAG
Photo by John Harvey [CC by-nc-sa]
It never happened to you? It sure did to me! I can’t remember how many times I went shooting just to notice later on that I forgot the CF cards at home. Just a few months ago my wife and I took a photography trip to Croatia and I totally forgot to pack the battery charger with me! So if you are as clumsy as I am, maybe you should trust your wife in packing things up for you.
2. NOT DOUBLE CHECKING ISO SETTINGS
Photo by Tom Hensel[CC by-nc-nd]
This is surely one of the most common post subjects you will find if you linger long enough in Digital Photography forums. We are all somehow used to reaching for our ISO settings button just when we need to go “higher” and we too often take it for granted that the camera is set to the “correct” one every time we take it from the bag. And that is why so many people are asking for the ISO setting to be displayed in the viewfinder, until then and to avoid surprises, good or bad, make sure to double check that ISO setting every time you turn your camera on.
3. I’LL GET THIS STRAIGHT LATER
Photo by Grant Lindsay [CC by-nd]
Let me first say that I have nothing against Photoshop or any other kind of photo retouching I even pointed out some times ago an easy way to correct tilted pictures in the digital dark room. However I believe that if you can get it right on the field it is better. So if you have the bad habit of tilting your pictures, here are 6 tips that will hep you get them straight next time.
4. I SHOOT RAW, I DON’T CARE ABOUT EXPOSURE
Photo by Rich G. [CC by-nc-sa]
RAW is wonderful tool and gives us, photographers, a great deal of flexibility during post processing. The ability to tweak the exposure in RAW should be used ONLY within limits — blown highlights and and underexposed shadows can’t be recovered. So make sure to always get the exposure right.
5. DELETING PICTURES TOO FAST
Photo by Vitor Sá [CC by-nc]
Well I’m writing this specially for myself! I delete pictures faster than I take them sometimes… Here is a recent article from LightChasers explaining why we should never be doing this.
6. BETTER BODY INSTEAD OF BETTER LENS
Photo by BryanFenstermacher [CC by-nc]
I guess it is just a human nature but every time a new camera is released we have all tendency to become green with envy and deep down we should know that we would be much better investing in a better lens than in a better camera.
7. BLAMING THE MATERIAL
Photo by Sergio Bertolini [CC by-nc-sa]
And, of course, on the TOP of the list “Blaming the material”! When we do not manage of getting a decent picture we go like “AH if only I had that lens!” but if someone looks at a nice pictures of ours and says “Wow you should have a nice camera!!!” We go crazy… Anyway, remember folks, it is always the photographer never the Camera.
16 Inspirational Portrait Photography Techniques
http://blog.epicedits.com/2007/12/10/16-inspirational-portrait-photography-techniques/
16 Inspirational Portrait Photography Techniques By Brian Auer
I feel that these photos are strong enough to stand on their own without lengthy descriptions.
Want more great projects, amazing photos, Photoshop tips, and articles on photography? Subscribe to Epic Edits today so you don’t miss a thing.
1. PHOTOSHOP
If you’re good with post-processing and manipulations, use it to your advantage. Get crazy with the adjustments, try some new Photoshop techniques, and maybe even a composite image.
Photo by Paul Moody [CC by-nc]
2. TEXTURE
If texture is a big part of your subject, make it stand out and make it obvious. Match up the textures between your subject and your background. You might even try texturizing the entire photo for additional impact.
Photo by Sukanto Debnath [CC by]
3. OVEREXPOSE
Blowing out the highlights or making a high-key image makes a nice soft portrait with kind of a light airy feeling. Another advantage of high-key photos is that the smaller details and defects are blown away, making the image look much smoother.
Photo by sam_samantha [CC by-nc-sa]
4. UNDEREXPOSE
A dominantly dark or low-key image will naturally draw your eyes to the lighter parts. These tend to have a grittier and harder look to them than the high-key images.
Photo by ConfusedVision [CC by-nc-nd]
5. BACK-LIGHT
Hair lights up like crazy when it’s back-lit, so if hair is a big part of your subject make it stand out by placing your subject between you and a light source. You could also take this a little further and push the image to a silhouette.
Photo by Caleb Sconosciuto [CC by-nc-nd]
6. POSING
Get crazy with the pose and positioning — extra points if it looks uncomfortable. Not only with the poses, but also with your own positioning — shoot from different angles to achieve different impacts.
Photo by Socar Myles [CC by-nc-nd]
7. CULTURE
Capture the local culture — what’s mundane to you is exotic to us. Culture is everywhere, even in your own town. Just image you’re visiting from a different country — what things would then seem more interesting to you?
Photo by vodkamax [CC by-nc-nd]
8. REFLECTIONS
Make use of different surfaces to add that extra dimension — windows, mirrors, and water are all very good reflective surfaces that give a different result and texture.
Photo by Gary H. Spielvogel [CC by-nc-nd]
9. SHADOWS
Make the shadow an important part of the image. Sometimes the shadow can even be more prominent than the actual subject casting the shadow.
Photo by Brian Auer [CC by-nc-nd]
10. GET CLOSE
There’s no rule against cropping out most of the subject’s face. This draws more attention to the parts that are left in the frame.
Photo by Phil Hilfiker [CC by-nc-nd]
11. (UN)FOCUS
Out-of-focus subjects can be more interesting than the in-focus subjects. It kind of adds some mystery to the image because you can’t quite make out who that person is.
Photo by a bout de souffle [CC by-nc-nd]
12. MOVEMENT
Use movement to show action, even if it blurs out the subject entirely. In cases like this, think of the person as a means of creating the subject rather than being the actual subject.
Photo by ArtWerk [CC by-nc-nd]
13. CAPTURE THE MOMENT
Catch somebody doing something they love, even if it’s not staged. Street photography is one of my favorite genres because it captures life as it happens — unstaged and unposed.
Photo by Mireia [CC by-nc-nd]
14. COLORS
Use vibrant and contrasting colors to draw attention to parts of your subject. This could be makeup, clothing, accessories, or whatever else you can get your hands on.
Photo by TNT Photo [CC by-nc-nd]
15. GET SERIOUS
Not all portraits need to have a smile, capture the serious emotions too. Some of my favorite portraits have no hint of a smile in them, and they’re highly emotional.
Photo by Saad Akhtar [CC by]
16. PROPS
Use the props and tools around you to make the setting more interesting. Find things to place your subject in, on, under, around, etc.
Photo by Bachellier Christian [CC by-nc-nd]
Friday, October 10, 2008
New October Seminars and Courses added to Workshops@Adorama
Thanks Gary for passing these along!
New October Seminars and Courses added to Workshops@Adorama; Register now!
We at Workshops@Adorama wanted to remind you that there's still time to register for our October Workshops, and to register in advance for the many great Workshops we have in store for November...but wait, this just in: We've added two more in October! Follow the links to learn about...
On October 27, 6:30-9:00 PM Seminar Sponsored by Adorama, NIK Software and PictoricoThe Dynamic Portrait - From Creation to Selling your Photography in the Fine Art Market with instructors: Michael Gilbert, international photographer and Janice Wendt, professional retouch artist.
On October 30, 6:30-8:30 PM Seminar Sponsored by Adorama and CanonCanon's EOS 50D: Introduction, Exploration and Experience with Jeff Fuller, Canon Professional Market RepresentativeEach of these Seminars cost $25, but each registered attendee will receive a $25 coupon at the event, which is redeemable for 30 days, either at Adorama's retail location or at www.adorama.com.
In addition, you still have a little time to register for other exciting courses taking place this month, including:
October 12: Photowalking in Central Park and Central Park Zoo with Joe DiMaggio
October 12: Digital Infrared Photography with Jean Miele
November Workshops Registration Open In November, Workshops@Adorama swings back into full gear with an extensive variety of popular and new Workshops for photographers at all levels of experience. They include:
Nov 2: Adobe Photoshop Understanding Layers & Masks with Jean Miele
Nov 3: Getting Started with Adobe Photoshop: Beginner's Level with Jill EnfieldNEW
Nov. 6, 13 & 20: Portfolio and Promotions Boot Camp: Learn How to Edit and Present Your Work Successfully with Gina Alyse Lengyel
Nov 9: Nikon D40/D40X/D60 Seminar (10:30AM)
Nov 9: Nikon D300 Seminar (1:30 PM)
Nov 9 & 12: Discovering the Artful Landscape Design and Architecture of Central Park with Allen Rokach
Nov 9 & 12: Seeing New York in a Different Light: Night and Low Light Photography with Jill Waterman
Nov 9 & 16: Overcoming Fear of Flash: Lighting Boot Camp with Arlene Collins
NEW Nov 11: Seminar Sponsored by Adorama and CanonSelecting and Using Canon Lenses with Jeff Fuller, Canon Professional Markets Representative
Nov 16: Photoshop in B&W: The Next Step with Jean Miele
Nov 18: Business of Photography: Panel Discussion with Top Creatives moderated by Louisa Curtis
Nov 19: Color Management: What is it and How to Use it to Get Better Prints with Maria Ferrari
Nov 23: ABC's of Digital Photography and Digital SLRs with Steven Hirsch
There are many more Workshops to choose from! Go to our 2008 Fall Workshops page for complete details and to register. Unless otherwise indicated, Workshops take place in The Adorama Building, 42 West 18th St, New York, New York. Advance registration is required for all Workshops. We look forward to seeing you! If you have any questions or need assistance in registering, please contact Carl Nilson, Monday-Thursday, from 9:00AM-6:00PM by email at carln@adorama.com or by phone at 212-741-0401 ext. 2216.
How to Chrome Plate your Cherries
http://www.worth1000.com/tutorial.asp?sid=161155&page=1
How to Chrome Plate your Cherries By briansteenstry
Chrome is tough... It doesn't really have any properties other than reflectiveness, which makes it a real challenge to represent in a photographic image. It's mostly about the reflections, and I will attempt to show how I got the reflections dialed in for the Chrome Cherry entry. I have divided the process into 7 steps on the following pages. I am not going into great detail about selecting and masking, assuming everyone who reads this is an old pro at that stuff. (Skip to the end if all you want is a screenshot of the layers pallete : )Thursday, October 9, 2008
15% discounts on all of the Adobe software
The new CS4 will be out soon and can be pre-ordered. It is $199 for the upgrade but I got it thru Adobe for $169.

You can receive 15% discounts on all of the software at Adobe's site (incl. CS4 & LR2) by visiting this link at the Adobe store, then clicking on the 'Product Categories' arrow on the right, and finally by clicking on 'Photoshop Family'.
just a funny, I wrote CS4 and held the shift key by accident and got CS$ -- kind of true, eh? but worth it...
Top Ten New Features in Photoshop CS4
I could sit here and talk to you all day about what I think is amazing in the new Photoshop CS4. Let me give you my top ten features. By RC Conception
THIS weekend “The Art of Nature Photography; It Ain’t Just Birds”
PORTLAND, MAINE: “The Art of Nature Photography; It Ain’t Just Birds” Weekend How-To Seminar/WALK-INS WELCOME
“The Art of Nature Photography; It Ain’t Just Birds” Weekend How-To Seminar in Portland, Maine
October 11-12, 2008
Eastland Park Hotel, 157 High Street, Portland, ME
This just in: Canon Pro Markets Rep Carl Peers will be joining us with a trunk-load or two of the latest Canon cameras and lenses and a ton of knowledge.
Thanks to Canon USA’s David Carlson for arranging that and to Explorer’s of Light Coordinator Steven Inglima for his support.
WALK-INS WELCOME
Time is growing short. We have 81 folks signed up. Walk-ins are welcome. Do consider joining us for great weekend filled with learning, slide programs, demonstrations, and super door prizes. Saturday: creating great images in the field. Sunday: optimizing your images quickly while making them look great.
The cost of the weekend seminar will be $169. The cost of either single day will be $99. Members of qualifying camera clubs are invited to apply a $10 discount. (If you are a member of a camera club or other photography organization please e-mail us before registering to learn how your group can become a qualifying club). Register with a friend or a spouse and take $10 off each registration. Register in groups of four or more and take $20 off of each registration. Register in a group of ten or more and take $30 off each registration. It is highly recommend that folks purchase the buffet luncheon option ($15/day includes tip and tax). Those purchasing the lunch option will receive their lunch coupon when they check in each morning.) The cost of the weekend seminar plus the two lunches is $199.
There are three ways to register:
1- Send a check for the full amount made out to "Arthur Morris" to PO Box 7245, Indian Lake Estates, FL 33855.
2- Call us with a credit card at 863-692-0906.
3- Send us a Paypal (using either any link on our site or your Paypal account) to us at birdsasart@att.net.)
In all cases, we will need your e-mail address, your mailing address, and your daytime and evening phone numbers.
Epson 7 day sale
Epson is having a 10% sale (end 10/15)
Use code 8TZCASE to get 10% off on ink and paper
Also Free Overnight Shipping on Orders of 3 or More Ink products
Get Free Overnight Shipping on any order which contains three or more ink products shipped to the contiguous U.S. If you add items to your shopping cart other than ink products, standard shipping charges will apply to your entire shopping cart. This offer is valid in the U.S. only online at the Epson Store. Offer cannot be used in combination with other special offers or sale items. Subject to change without notice. Limited to stock on hand.
Create a Vintage Polaroid Effect
http://www.myinkblog.com/2008/06/23/create-a-vintage-polaroid-effect/
I love anything graphic design that has that vintage grunge kind of look. This tutorial will show you how to create a stunning vintage polaroid effect. It’s fairly simple to make and can be used in many different types of projects.
What you’ll need
This tutorial will be completed using mostly filters and fills, but we will need three photos to complete the look. The first is the tractor image we’ll fill in the polaroid with, if you have an image you’d like to substitute, by all means use that. Also in the zipped file are two grunge textures. Download them all here. Note that the photo was one I found at stock.xchg, an awesome free stock photography site, that is nearly as good as IStock (but it’s FREE!) I found the textures at grungetextures.com, another useful and free site.
I love anything graphic design that has that vintage grunge kind of look. This tutorial will show you how to create a stunning vintage polaroid effect. It’s fairly simple to make and can be used in many different types of projects.
What you’ll need
This tutorial will be completed using mostly filters and fills, but we will need three photos to complete the look. The first is the tractor image we’ll fill in the polaroid with, if you have an image you’d like to substitute, by all means use that. Also in the zipped file are two grunge textures. Download them all here. Note that the photo was one I found at stock.xchg, an awesome free stock photography site, that is nearly as good as IStock (but it’s FREE!) I found the textures at grungetextures.com, another useful and free site.
Wednesday, October 8, 2008
Nature Conservancy 2008 Photo Contest
Nature Conservancy 2008 Photo Contest
The Nature Conservancy is requesting submissions for its 2008 photo contest. The winning image will be featured in their 2009 wall calendar. For details and submissions see http://support.nature.org/site/PageServer?pagename=contest_ph6
Non-photographers Say the Darndest Things
http://www.naturephotographers.net/articles0908/kl0908-1.html
Non-photographers Say the Darndest Things
Text and photography copyright © Kerry Leibowitz. All rights reserved.
Non-photographers Say the Darndest Things
Text and photography copyright © Kerry Leibowitz. All rights reserved.
Talking pictures
An iInteresting Blog: Talking pictures http://natashamhatre.blogspot.com/
It has very unique images like: Mushrooms and fireflies (twin obsessions)
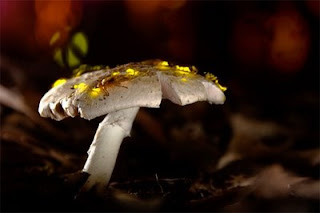
Actually any kinds of photographer needs to learn about light. It's right there in the name, learn
to write (graphy) with light (photo). http://natashamhatre.blogspot.com/2007/04/wildlife-photo-secrets-2-learn-about.html
It has very unique images like: Mushrooms and fireflies (twin obsessions)

Actually any kinds of photographer needs to learn about light. It's right there in the name, learn
to write (graphy) with light (photo). http://natashamhatre.blogspot.com/2007/04/wildlife-photo-secrets-2-learn-about.html
Current Photo Contests
What I like about this site is that is summarizes the contest. For example...
Copyright: Photographers remain full copyright owners of all images submitted to The Visual Culture Awards
check the terms of any contest before you enter it.
Eligibility: Professionals and students alike are encouraged to enter.
Entry deadline: 1 November 2008
Entry fee:
some contests have an entry fee while others are free -- they have this in their summary so you don't have to search for it.
Current Photo Contests
Currently open amateur and professional 2008, 2009 photo contests and competitions around the globe
Learn how to add excitement and energy to your photo in just a few simple steps
From PlanetPhotoshop.com
http://www.planetphotoshop.com/energize-that-photo.html
Learn how to add excitement and energy to your photo in just a few simple steps.
http://www.planetphotoshop.com/energize-that-photo.html
Learn how to add excitement and energy to your photo in just a few simple steps.
NAPP on YouTube
From: http://www.planetphotoshop.com/
NAPP on YouTube
September 30th, 2008 Corey Barker
Did you know that the NAPP has a page on YouTube? I didn’t even know that. No, I’m kidding. Yes, the video guys over at Scrivtown have put together a collection of tutorials, interviews, and a few surprises and posted them for all to enjoy. You can even watch the keynote movies from past Photoshop Worlds. Also included is the wildly popular iPod Flea commercial among many other frivolous spots. So if you are in the mood for a laugh or maybe want learn a little something go check it out.
John Nack’s blog has a really interesting 30 minute video by Adobe Evangelist Julianne Kost on the new Bridge. Really interesting stuff. Check it out here.
Upgrading from Photoshop 7
October 7th, 2008 Corey Barker
If you are using Photoshop 7 and you want to upgrade to the newest version of Photoshop. You need to hurry and upgrade by October 15. According to John Nack’s blog, Adobe will only allow upgrading up to three versions back. So to upgrade to Photoshop CS3 you would need CS2, CS, or Photoshop 7. When CS4 is released Photoshop 7 will no longer qualify. So check on that and make sure your version qualifies. Don’t wait, October 15 is closing in.
40 Cool Beauty Amplifying Photoshop Effects
http://psdtuts.com/web/40-cool-beauty-amplifying-photoshop-effects/#more-335
40 Cool Beauty Amplifying Photoshop Effects
Beauty retouching is one of the most sought-after skills in Photoshop arts today. The techniques here are used not only on magazine covers, but in advertising campaigns, digital artwork and professional photography. Here are 40 excellent tutorials to help you add this skill to your arsenal.
Note: We know that there are plenty of good arguments against the use of beauty retouching. If you find these techniques objectionable, we encourage you to think about their potential for use in your digital art, whether you want to render a killer with blood-red irises or a Goddess with glowing skin.
Either way, remember that you have ultimate control over how you choose to use your Photoshop skills, and in what context you put these effects into practice.
40 Cool Beauty Amplifying Photoshop Effects
Beauty retouching is one of the most sought-after skills in Photoshop arts today. The techniques here are used not only on magazine covers, but in advertising campaigns, digital artwork and professional photography. Here are 40 excellent tutorials to help you add this skill to your arsenal.
Note: We know that there are plenty of good arguments against the use of beauty retouching. If you find these techniques objectionable, we encourage you to think about their potential for use in your digital art, whether you want to render a killer with blood-red irises or a Goddess with glowing skin.
Either way, remember that you have ultimate control over how you choose to use your Photoshop skills, and in what context you put these effects into practice.


Tuesday, October 7, 2008
Scott Kelby Lightroom 2 vs. CS4
From Scott Kelby
I’ve been seeing a lot of comments on the blog this week that I wanted to address, but when I was talking about it to my buddy Matt Kloskowski (who’s getting similar comments on his blog), he suggested that we do a short video, rather than writing the 5,000 words it would take to address both the “Lightroom 2 vs. CS4″ and my and Matt’s carefully orchestrated coverup of the problems some people have been having with Lightroom 2, so to round out this week, here’s a video clip, created exclusively for you guys, on both of these topics. View the video
I’ve been seeing a lot of comments on the blog this week that I wanted to address, but when I was talking about it to my buddy Matt Kloskowski (who’s getting similar comments on his blog), he suggested that we do a short video, rather than writing the 5,000 words it would take to address both the “Lightroom 2 vs. CS4″ and my and Matt’s carefully orchestrated coverup of the problems some people have been having with Lightroom 2, so to round out this week, here’s a video clip, created exclusively for you guys, on both of these topics. View the video
Monday, October 6, 2008
Instant JPEG From RAW (IJFR)
http://www.rawworkflow.com/blog/2008/9/29/instant-jpeg-from-raw-ijfr.html
I gotta tell ya, people are lovin’ that free “Instant JPEG from Raw” utility Michael Tapes and Imagenomic created! Michael, if you were running, I'd vote for you! My thanks once again for doing something so cool and useful for our community! Scott Kelby, Sept. 26
IJFR V1.0 (free)
Link to registration page
IJFR User Guide (Draft)
Click to view PDF. Right click to save to disk (save target as..).
IJFR is not an application. Let's call it a utility that attached itself to the Win or Mac Operating System. That means that it is not associated with any specific application.
In Windows (XPsp2+/Vista32), you unzip the download file, and run the .msi installer. There is no application installed. The registry will be modified, and a DLL will be placed in c:\Program Files\Instant JPEG From Raw. That's it. Right click on a raw or folder of raws to invoke IJFR.
In Mac (OS X 10.4+), you unzip the download file, and drag the "plug-in to \Library\Context Menu Items. The IJFR plug-in is attached to the finder. Reboot or Force Quit the finder and you are set. Right click on a raw or folder of raws to invoke IJFR.
IJFR is not a raw converter. It does not develop an image. It extracts the existing embedded JPEG that was developed by the camera and inserted into the raw file container. We just get it out for you.
This is not a new concept. As pointed out in my blog post at Photoshop Insider, there is a long history of the embedded JPEG, and many applications have had this feature over the years. Some still due. The point of IJFR was to bring this workflow enhanced to the public (it has been a closely held secret for some reason), and format it so that it was as easy to use as possible. And I decided to make it free, as a give back to an industry that has been good to me.
As I said there is a lot of history behind this, but in terms of IJFR, I could not have done it without my friends at Imagenomic. The guys and girls behind the great Noiseware and Portraiture plug-ins. After paying to have a Windows based prototype built, I decided that IJFR should be cross platform, both for Windows and Mac. My subcontractor could not do that so I mentioned it to my friends at Imagenomic who write both Windows and Mac code all day long. I asked for a bid, but based on it going to be a free utility, they decided to donate their services, again in the concept of giving something back to the photographic community. I am grateful for the donation of their time and expertise. Please take a look at their fine products (I say that because I use them!) if they are applicable to your work.
IJFR supports almost all raw formats including DNG. Some cameras that we missed are Canon 50D, all Sony .arw, and Canon sRaw. We do not support medium format digital files, although someone has asked me to look into supporting Phase One files.
IJFR does not work within Windows Explorer in Vista 64, but if you open a file dialog from a 32 bit application, you can right click on the files or folder there and use IJFR with this slight work around. We will look into compatibility directly with Vista 64.
IJFR has no control over the look of the file. Since the file was created by the camera, it was the settings on the camera at the time of capture that rendered the file into what it looks like. In the case of a DNG exported from an application like Lightroom or ACR, it is the adjustments in that application that will affect the look of the rendered JPEG that is stored in the JPEG (it is called the Preview image).
IJFR does have control over the size of the image. The largest size (native size) is determined by the camera or DNG exporter. But IJFR can render smaller sizes based on its resize feature.
Sunday, October 5, 2008
Lexar's photoshop disaster
OK, you all know that I love "photoshop disasters", check out this reflection in this Lexar ad.

Saturday, October 4, 2008
John Chiara photographer
http://www.youtube.com/watch?v=U0ta32g9M6c
Chiara photographs cityscapes in a process that is part photography, part event and part sculpture – an undertaking in apparatus and patience. Many times this process involves composing pictures from the inside of a large hand-built camera, that is mounted on a flatbed trailer, and produces large scale, one of a kind, positive exposures. Chiara is a native Californian who lives and works in San Francisco.
Chiara photographs cityscapes in a process that is part photography, part event and part sculpture – an undertaking in apparatus and patience. Many times this process involves composing pictures from the inside of a large hand-built camera, that is mounted on a flatbed trailer, and produces large scale, one of a kind, positive exposures. Chiara is a native Californian who lives and works in San Francisco.
Nikon D90 Hands-on Review By Allan Weitz
Nikon D90 Hands-on Review
By Allan Weitz
Soon after receiving a Nikon D90 to play around with I slipped off to shoot images along the Delaware River. Nearby was a family of kayakers who had stopped for a breather and a bite of lunch. It wasn't long before 'Dad' moseyed up along side me for a closer look at what I was doing.
"I own a D300 and I thought that's what you are using… but that camera looks smaller and you're shooting video with that thing and my D300 doesn't do video… at least I don't think it does. Is that the new one I keep hearing about? If it is… I want one". I told him it was, and that he should, and he told me he was going to order one from B&H, which – don't ya' know - happens to be where he gets all of his camera gear. And yes… this really happened.
Available as a 'body only' or with an 18 to 105mm Nikkor AF-S VR II zoom lens, the D90 is a dead-ringer for the D80, but a closer look reveals a 12.3-megapixel DX-format CMOS sensor hiding behind the mirror (up from the D80's 10.2-megapixel sensor), which is driven by a Nikon EXPEED image processor. Shutter-response times are wickedly fast (0.15-second start-up time) and shutter-delay times at 65-milliseconds, are all-but-zip. From this day forward if you miss the picture you have only yourself to blame.
Another feature lifted from Nikon's pricier D3 and D700 is a 3" tempered glass TFT LCD that packs 920,000 dots worth of detail. This near tripling of resolving power over the last generation of LCD screens enables truly critical focus checking. For critical lighting corrections the new screen also displays a wider range of tonality from highlight trough shadows.
Unlike the D3 and D700 however, the D90 sports Live View, which is quite useful for checking fine-focus. It's also a comforting feature for those who've grown accustomed to composing pictures while squinting at an LCD screen from arms length. Truth is, why anybody – under normal circumstances - would want to compose images while squinting at an LCD screen - even a good one - when using a camera with a bright optical finder is beyond me, but it's there if you want it.
And speaking of optical finders, the finder on the D90 displays about 96% of the total image, and there's a 16-frame grid display that can be called up electronically as needed for precise image composition and subject placement.
For capturing fast action, the D90 can record images at burst-rates up to 4.5 frames-per-second in the form of NEF (RAW) files, three levels of JPEG compression, or a combination of the two. Shutter speeds range from 30-seconds to 1/4000th, and as with f/stops, can be set in a choice of full, half, or third-stop intervals. Top sync speed with flash on the D90 is 1/200th.
D-Movie'
The big pooh-bah with the D90 is that it's the first DSLR with the ability to capture HD (1280 x 720p) 24-f/p/s video with sound. While somewhat squirrelly to use as compared to a true video camcorder, it non-the-less captures impressively sharp video in clips up to five minutes in length. D-Movie video can be captured at three levels of resolution: 320x x 216 pixels, 640 x 424 pixels, and HD720p (1280 x 720 pixels).
A key technical – and creative - benefit of shooting video with the Nikon D90 is that the camera's DX-format CMOS sensor is far larger than the sensors found in most consumer camcorders. As a result, the image quality of video captured with the Nikon D90 is noticeably sharper and contains fuller detail and tonality in the mid-tones as well as in highlights and shadow areas. And because you can make full use of the full lineup of Nikon-mount lenses from fisheye through super telephoto - not to mention fast, wide-aperture lenses for incorporating selective focus into your video - your creative options regarding lens choices are as good as it gets. That's the good news.
One aspect of the story is that you lose some creature comforts when you switch from still to video mode, e.g., autofocus and viewing the action through the camera's viewfinder, is replaced with viewing, composing and auto focusing on the 3" display and AF locks at the moment the record button is pressed in D-Movie mode. You can still manually focus the lens as well as zoom while recording using the live image that appears on the LCD as your guide, but this can be somewhat challenging when shooting under bright sunny skies.
If you're shooting with a zoom lens, it's a good idea to pre-focus on your subject with the lens zoomed in tight and pull back to the desired focal length before hitting the shutter button. And don't forget to pack along your reading glasses.
Unlike traditional camcorders that utilize global shutters and record the video data onto CCD sensors, the D90 relies on a rolling shutter and a CMOS sensor, which because it records a 24p (progressive) f/p/s frame rate in a piecemeal fashion from top to bottom across the sensor, can occasionally display image 'wobble' when recording certain types of movements. But do keep in mind this is a small price to pay for having the ability to call up such a cool feature at the hit of a switch.
At the end of the day, the folks at Nikon can still win the gold cup for producing the first crossover DSLR/Camcorder option for serious amateurs and curious pros alike… for under a grand no less (body only). The D90's 12-plus megapixel APSC-format CMOS sensor takes sharp, full-toned still images that open up to about 35Mb as well as HD-quality video snippets up to five minutes in length.
Post-Click Creativity
The D90 contains many image enhancing features including Nikon's Active D-Lighting, which helps maintain shadow and highlight details. It can be set to work automatically at the time of the initial exposure, or as a post-exposure option.
Other image enhancers include Nikon Picture Control, which allows you to choose from a choice of six settings, which include Standard, Vivid, Neutral, Monochrome, Portrait, and Landscape. A Quick Adjust function allows you to further tweak the image settings as well as save them as Custom Picture Controls that an be applied to other images.
Other nifty features found on the D90 include Image Straightening for correcting off-tilt horizon lines +/- 5°, fisheye effects, D-Lighting, Red-Eye Reduction, Trim, Monochrome, Filter Effects, Color Balance, Small Picture, Image Overlay, Quick Touch, and Nikon's integrated Scene Recognition and Face Detection System.
ISO, Noise, and Dust
Noise reduction is one issue the D90 seems to have a good handle on. Images taken of a GretagMacbeth ColorChecker Gray Scale Card under studio lighting as well as images taken outdoors under both bright and low light conditions proved to be quite impressive from the camera's base ISO of 200 through ISO 1600-2000. But even at ISO 3200 and 6400, the D90 produced image files that would easily pass muster for most any application. Equally annoying as noise are errant dust particles, which are kept to a minimum thanks to Nikon's Integrated Dust Reduction System.
Real World Performance
The D90's 11-point AF system performed admirably under most every lighting situation I encountered. Similar kudos for the D90's 3D Color Matrix Metering II, 420-pixel exposure system. To further ensure dead-on exposures and AF, the D90 features the same Scene Recognition System with Face Detection found in Nikon's upper-tier D3 and D700 cameras.
The handy pop-up flash is fine for party and/or grab shots, and takes in the field of view of an 18mm lens. The camera's flash can also be used as a wireless commander for triggering up to two groupings of Nikon SB-series Speedlights, which can also be mounted on the D90's hot-shoe or off-camera via TTL cord.
Location, Location, Location
The D90 can also be rigged to record each image's latitude, longitude, and altitude by attaching the optional Nikon GP-1 GPS attachment, which is designed to mount on the camera's hot-shoe.
Menus & Functionality
The menus on the D90 are to the point and easy to decipher, relying on text rather than icons to communicate the information. On the whole the D90 is comfy in the hand and should feel especially familiar to those already in the Nikon camp.
By attaching a Nikon Multi-Power Battery Pack MB-D80 onto your D90, you gain a second shutter release and control wheel for easier vertical shooting and the ability to pack dual EN-EL3e lithium-ion (or 6 AA batteries) for boosting your playtime up to 1700 exposures before needing to recharge your batteries.
NEF (RAW) files can be processed using Nikon's proprietary Capture NX2 imaging software, which is available optionally. For a hands-on review of Nikon Capture NX2 software, click here.
If you are a Photoshop fan, there should be an update of image file compatibility for the D90 (along with other cameras currently being introduced) in the not-to-distant future (CS4 perhaps?). Watch Adobe's website for all updates.
Please email feedback on this article, or suggestions for future topics, to photographyfeedback@bhphotovideo.com
Friday, October 3, 2008
Autumn Leaves, Autumn Light
Thought that this might inspire you :-)
Autumn Leaves, Autumn Light
Text & Photos by Allan Weitz
As you read this – assuming you live in the northern hemisphere – we are in the early days of autumn. And in case you haven't noticed, the days are getting shorter, the air is getting cooler (at least here in the northeast portion of the States), and the leaves on the trees are starting to get tinges of farewell-to-summer coloration.
Text & Photos by Allan Weitz
As you read this – assuming you live in the northern hemisphere – we are in the early days of autumn. And in case you haven't noticed, the days are getting shorter, the air is getting cooler (at least here in the northeast portion of the States), and the leaves on the trees are starting to get tinges of farewell-to-summer coloration.
Each season has it's strong points when it comes to taking pictures, but fall is one of the prettiest, and perhaps the most welcoming for picture taking. Gone is the oppressive heat and humidity, and because the sun doesn't get quite as high in the sky, harsh mid-day glare along with 'raccoon eye' shadows are less of an issue with each passing day. Shadows too are becoming more prevalent, even towards midday. Like I said, it's a fine time for picture taking.
Fall foliage is by far the prime reason most folks grab their camera bags and head out the door this time of year. Starting in late August, and running straight through Thanksgiving, trees and bushes cease producing chlorophyll, which in turn allows colors other than green to show through. In the early part of the season you have to look closer to find these snippets of color, but rest assured they are there. You just have to look a little closer. By the last week of September, the change in scenery starts taking center stage.

Most local newspapers and TV stations track 'peak' foliage times throughout the fall season. Even so, you can head out most any time these days and find if not troves of color, certainly small touches that pop out of the surroundings. Where you live, the types of trees in your area, your relative altitude, ambient temperature and rainfall all go into the mix when plotting peak color days. And even on peak days, the colors and quality of the atmosphere changes hourly.
In general, early morning and late afternoon offer the best opportunities for bold imaging. The lower the sun sits on the horizon, the warmer the light. The cool night air often produces mist towards dawn, which combined with the low angled rays of the rising sun, further adds to the mood and atmosphere of your photographs. The crisp blue skies common to fall days can be incorporated as contrasting backgrounds for the reds, yellows, and orange colors of the leaves. If you shoot with wide-aperture prime lenses, this is also a good time to play with selective focus.
And even if the sun isn't shining, that's no reason to stay home to catch up on paperwork as overcast skies and rainy days tend to saturate colors of the leaves, which in turn play off the monochromatic palette of the surrounding landscape.

From a creative point of view, make sure you play around with any and all lenses in your bag, and take the time to explore every scene from as many vantage points as possible. If you have a macro lens make sure you put it to use, and if you have a close-focusing wide-angle lens, do the same. Filling the frame with a brightly colored leaf and having its branch and nearby leaves fall away into the background can be very powerful.

Although color temperature and saturation levels can be tweaked in Photoshop (especially if you shoot RAW), using a Polarizing filter to reduce glare and saturate the colors is always a good idea for shooting foliage - rain or shine. Another type of filter worth toying around with is an enhancing filter, which can be purchased in a variety of sizes, strengths, and formats. Enhancing filters absorb portions of the blue end of the spectrum, which in turn further saturates the red, yellow, and orange colors of the landscape.
Foliage aside, autumn is also an excellent time to shoot cityscapes. With the sun dipping below the horizon line well before most people head home from work, it's possible to capture lit office windows and streetlights combined with the magical glow of dusk as a backdrop. While you can capture similar imagery other times of the year, by the time the sky turns gorgeous it's more likely many of the office lights have mostly gone dark.

Got a camera? What are you waiting for? Before you know it the show will be over and winter will be here.
Please email feedback on this article, or suggestions for future topics, to mailto:photographyfeedback@bhphotovideo.com?subject=Autumn
Thursday, October 2, 2008
"The Art of Nature Photography; It Ain't Just Birds"
Arthur Morris in Portland, Maine
Arthur Morris will be in Portland, Maine, the weekend of October 11-12, 2008, presenting his popular "The Art of Nature Photography; It Ain't Just Birds" how-to seminar. On Saturday Artie will describe the methods and techniques he uses for capturing incredible photographic images, and on Sunday he will share his complete digital workflow to help you optimize your images quickly.
I frequently recommend Arthur Morris as one of the best nature photographers to learn about exposure from. He understands the subject better than perhaps any other photographer I know. Besides tips on exposure, you'll learn much more about photography and digital imaging at his seminar.
For more details on registering for this seminar, go here:
http://www.birdsasart.com/Portland%20Seminar.htm
Subscribe to:
Posts (Atom)